Annular Eclipse, AZ 2012
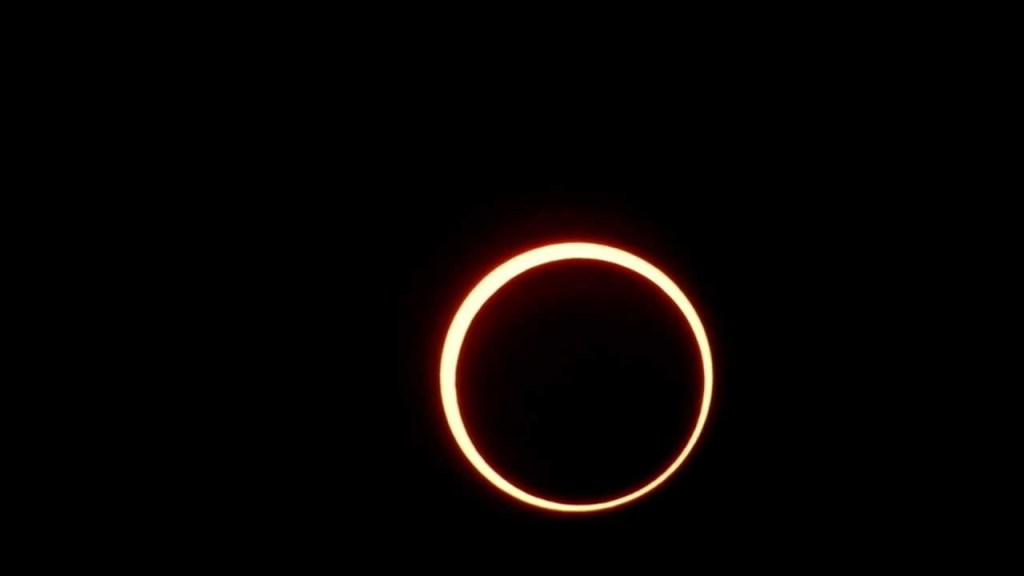
The May 20, 2012 solar eclipse was an “annular eclipse”, which occurs when the Moon passes directly in front of the sun, but the lunar disk is too far from the earth to cover the entire sun. This leaves the “ring of fire” with the full brightness of the sun around the black circle formed by the moon.
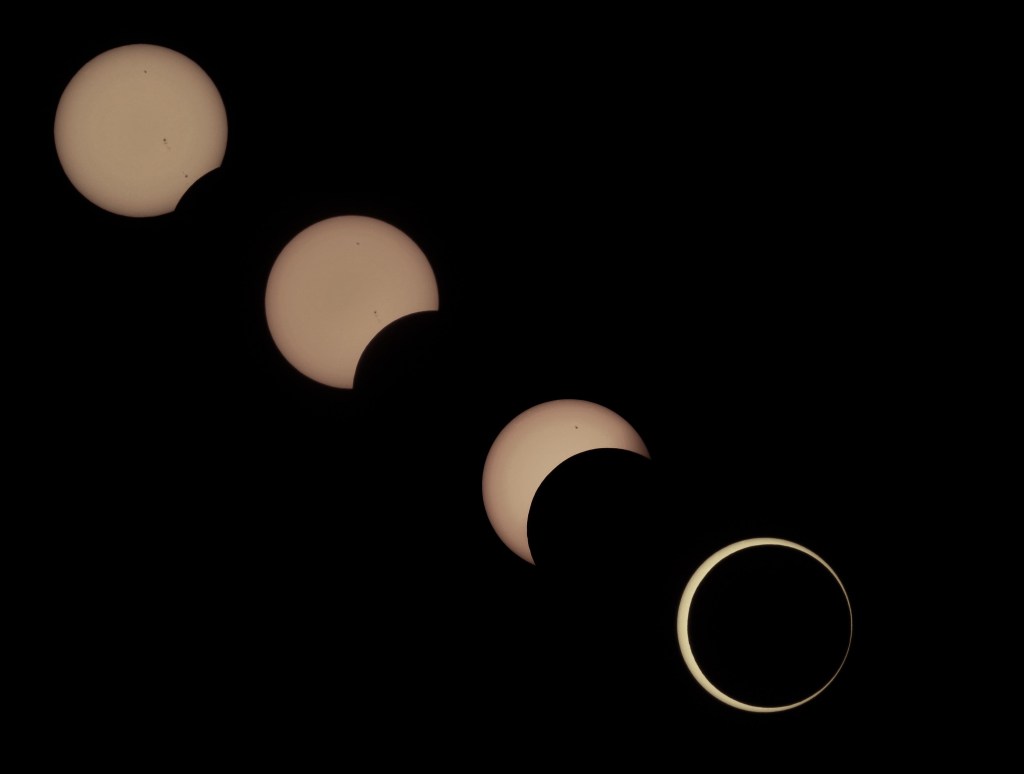
Although not as impressive as a total eclipse, in which the moon covers the entire surface of the sun, it is still a pretty impressive and rare event.
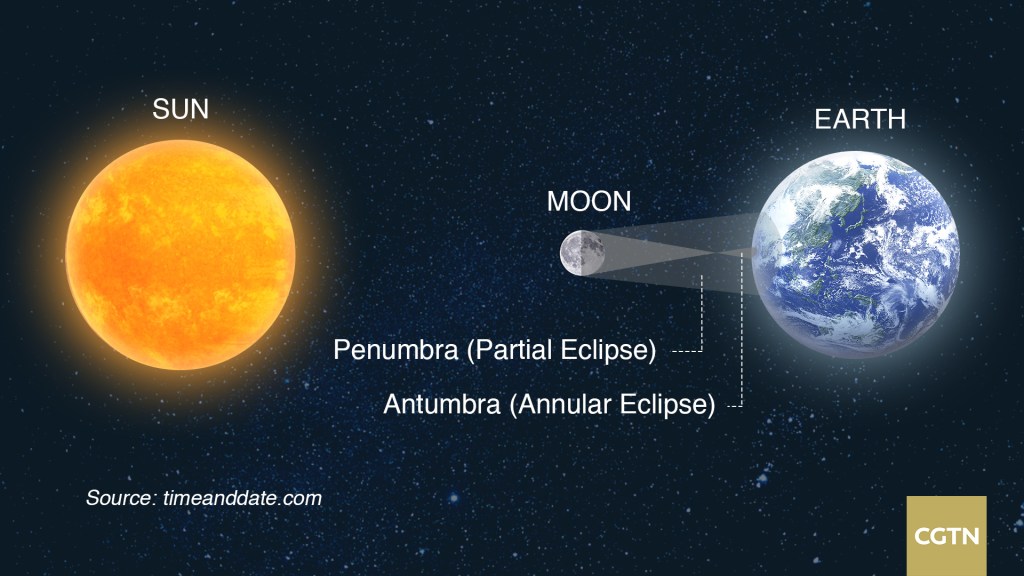
The “annularity path” in which the moon passes entirely in front of the sun, creating a ring, was a strip of about 300 km wide, starting in Asia, and ending near Lubbock, in Western Texas. Only right on the center of the path is the moon perfectly centered over the sun at the eclipse’s maximum. Outside the path, the eclipse is partial, resulting in a crescent sun.
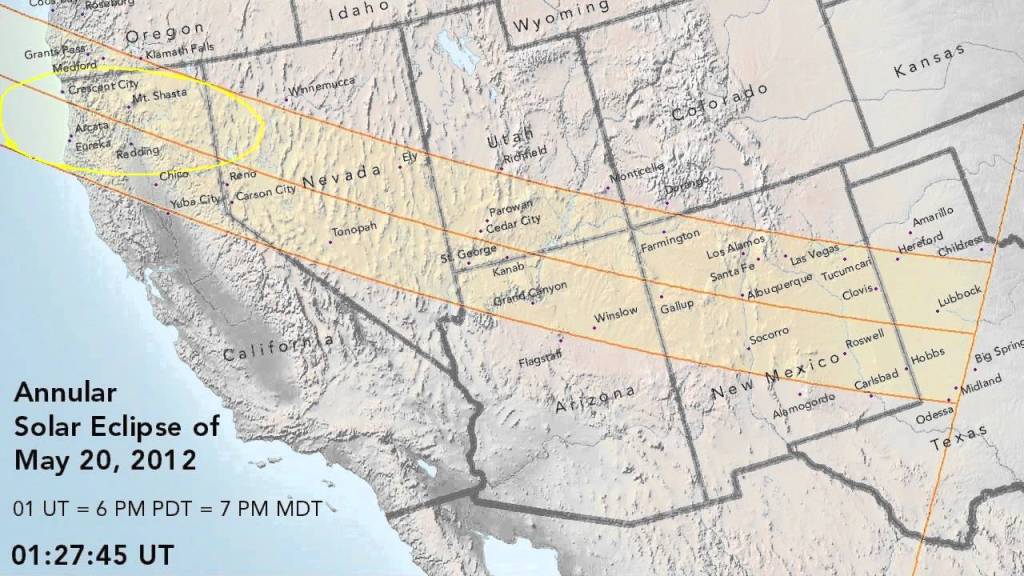
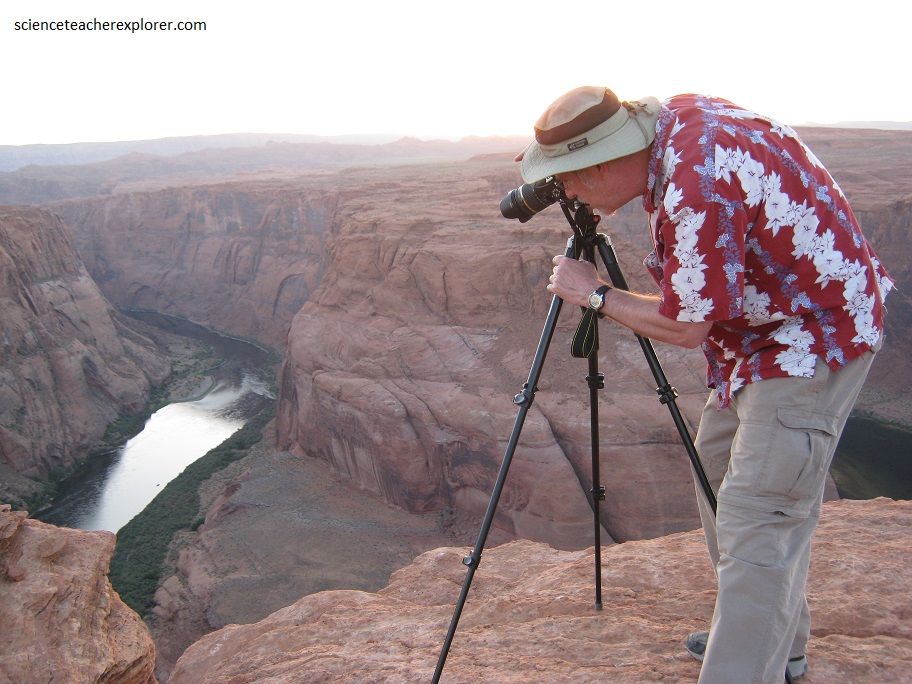
Pictured above, using a NASA mapping tool, I noticed that the center path of the eclipse crossed the Southwestern corner of Utah, (my home-state). I decided to travel to Page, Arizona, where the maximum of the eclipse would occur shortly before sunset, so it can be exposed properly while retaining color in the sky. At that time, the sun is much less bright. Equally important, it is closer to landforms, which make it possible to photograph the sun together with land using a telephoto lens, which fills more of the frame with the sun.
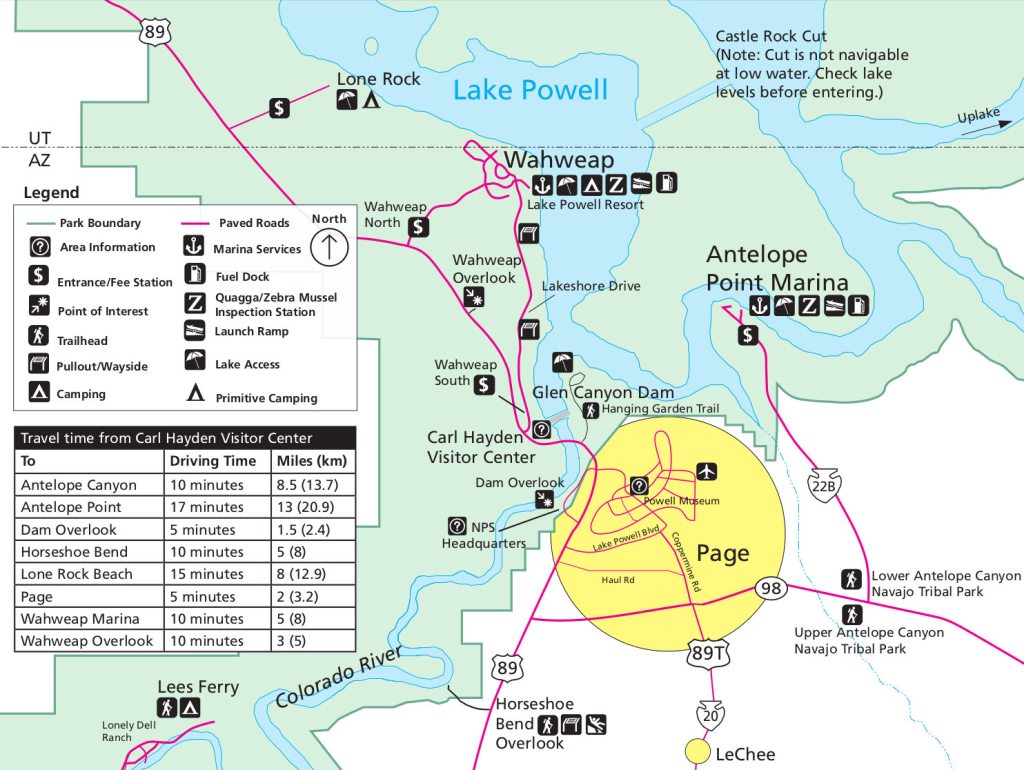
I settled on Horseshoe Bend Overlook, southwest of Page, Arizona. I was hoping to capture some of the local landforms in the photos. So, I gathered a group of faculty friends and students and made a road trip to Page, Arizona to witness the 2012 Annular Solar Eclipse on May 20th.
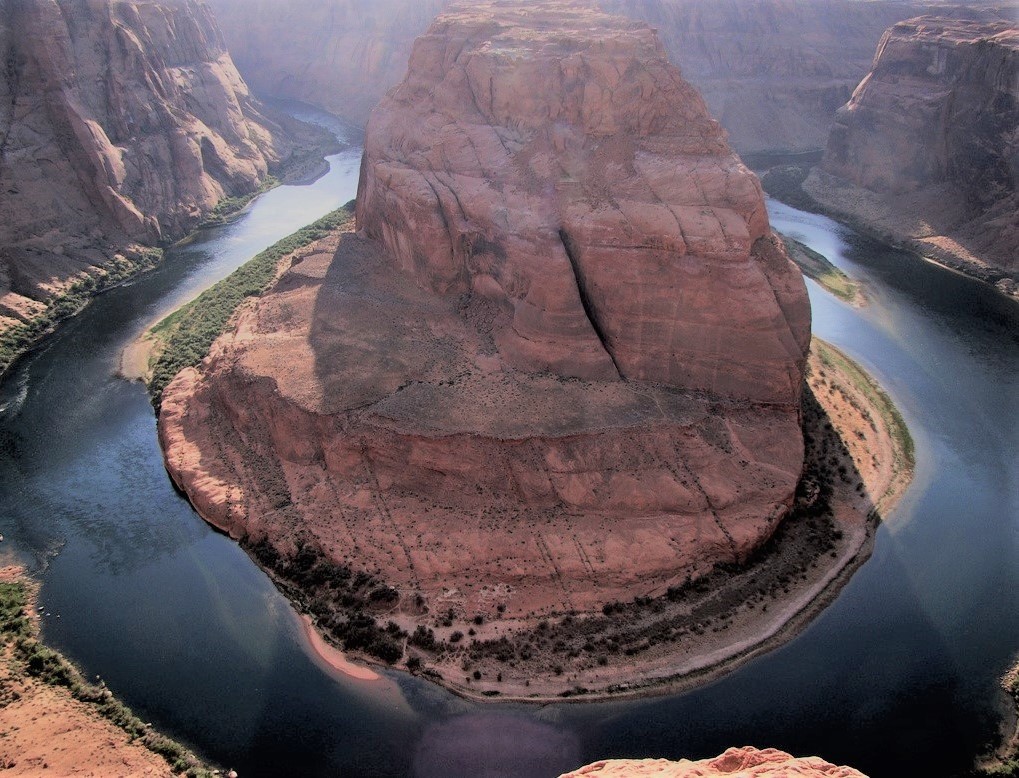
Horseshoe Bend is a horseshoe-shaped incised meander of the Colorado River located near the town of Page, Arizona. It is located 8.0 km downstream from the Glen Canyon Dam and Lake Powell within Glen Canyon National Recreation Area, about 6.4 km southwest of Page. Horseshoe Bend can be viewed from the steep cliff above.
The overlook is 1,300 m above sea level, and the Colorado River is at 980 m above sea level, making it a 300 m drop. Like all such meanders, the Horseshoe Bend formed when the underlying land was uplifted by tectonic forces. The uplifting acted to bring new life to the Colorado River, providing added power to cut through the Jurassic sandstone. This location added bit of fun to my faculty friends, all taking in both the eclipse and the extraordinary view at the same time.
During an Annular Solar Eclipse, it is dangerous to view any of it with the naked eye or by looking through optical devices such as binoculars or telescopes! This was critical! Why? You may have taken a magnifying glass out into the sun and burned leaves with it. If so, you’ll remember that when sunlight is focused onto a small spot with a lens, it gets hot enough to start a fire. So understand this: you have a lens just like that in your eye. If you look at the Sun, your eye’s lens will concentrate the Sun’s light and focus it onto a very small spot on the back of your eye, on the retina. This literally burns your eye, causing permanent eye damage or blindness. In additional, there are no pain sensors inside your eye—so you won’t even know it’s happening!
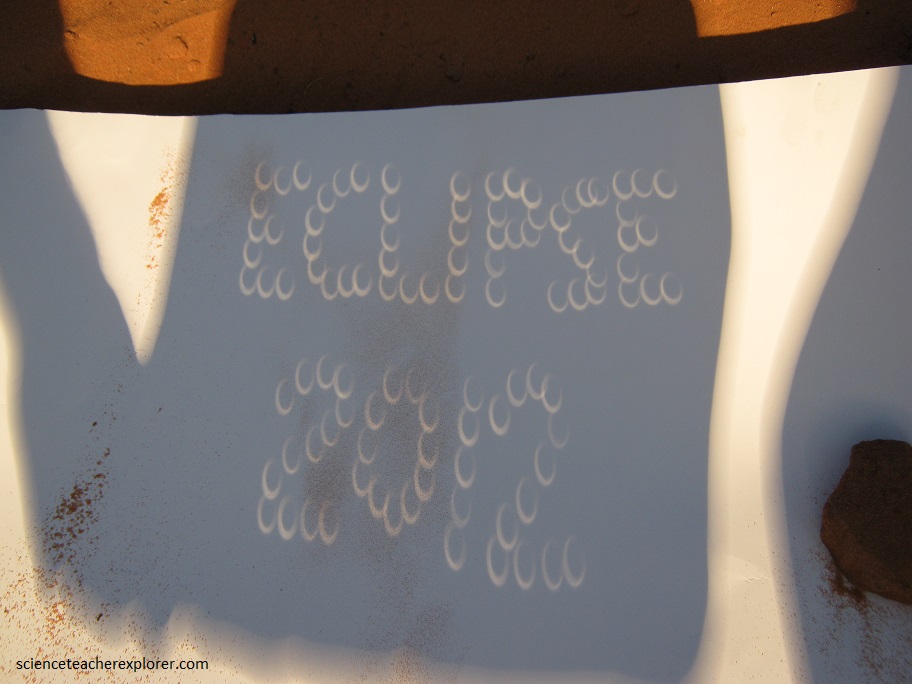
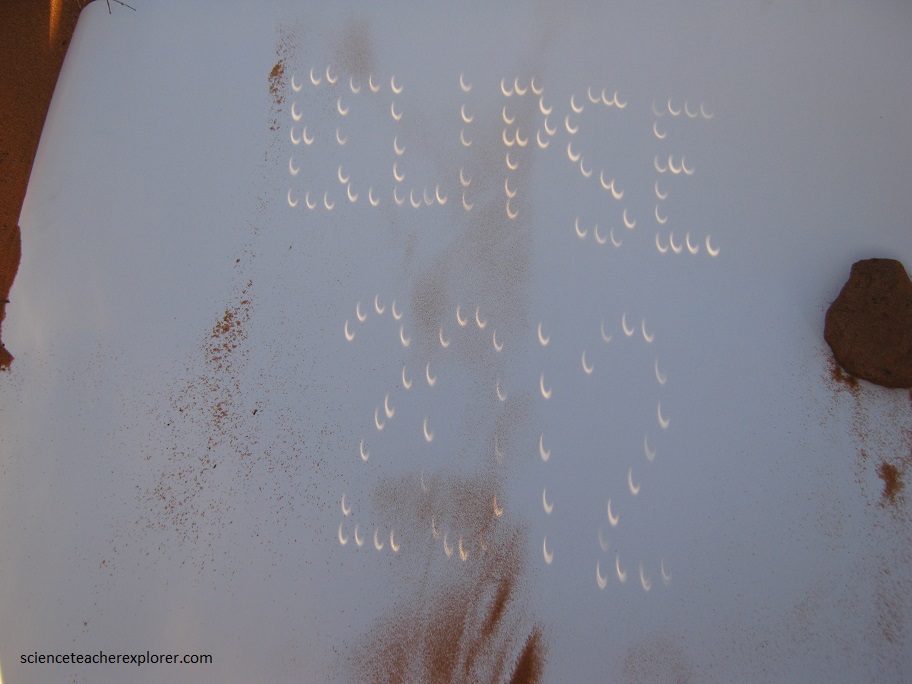
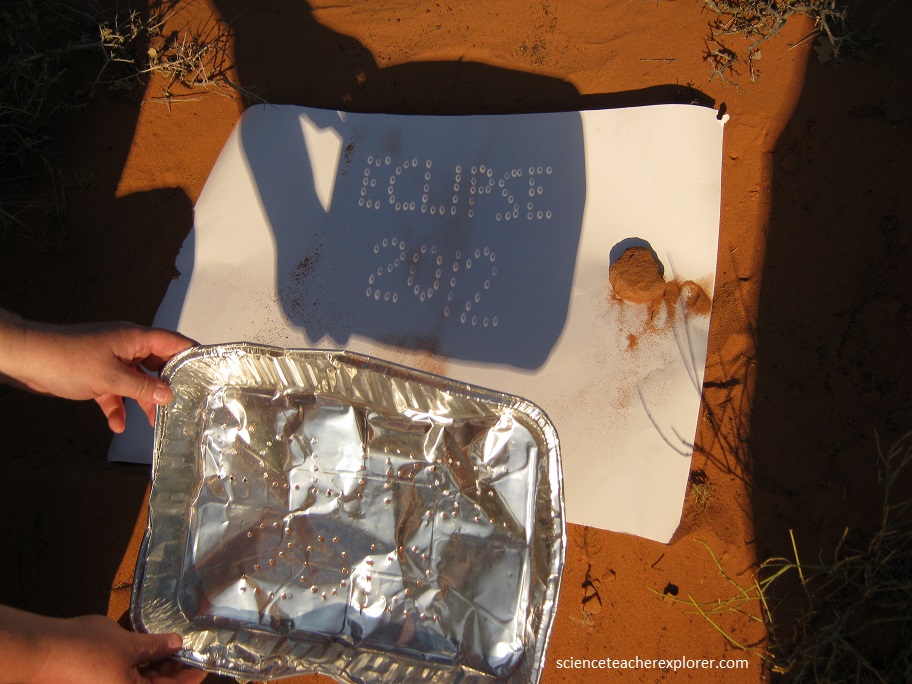
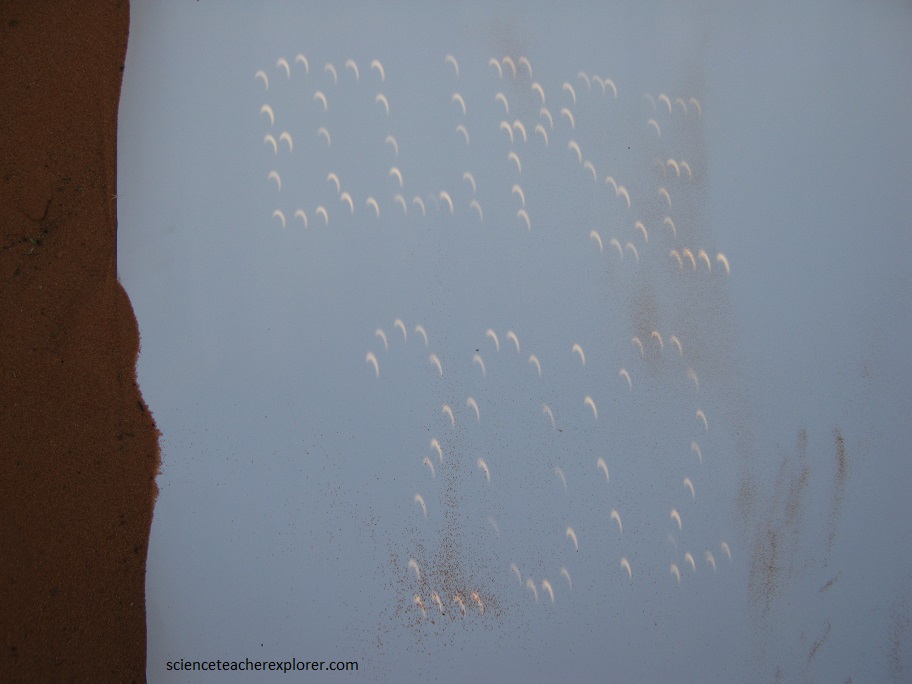
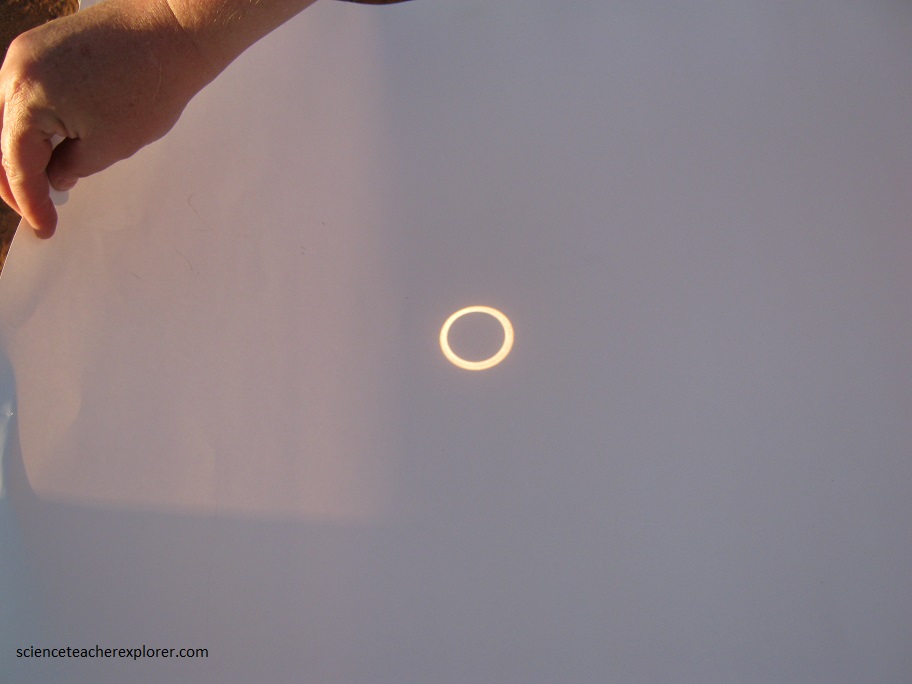
There are safe ways to view the sun. Pictured above, I used the simplest method, which required a piece of aluminum foil, a pin, and a sheet of white poster board. I then made several pinholes in the middle of the foil that spelled out, “Eclipse 2012”. With the other sheet of white poster board, I used it as a screen. Overall, with the Sun behind me, I held the pinhole aluminum foil as far from the screen as I could. This projected the sun onto the screen. The farther the pinhole was from the screen, the bigger the sun image was. Compare the last two images above. In the second image, I held the aluminum foil further away from the white paper. The image below shows me holding the aluminum foil closer to the screen. (This happened during the Eclipse)
The critical times during the entire eclipse were the following:
(First Contact) Partial solar eclipse begins: 5:25 p.m. MST
(Second Contact) Annular solar eclipse begins: 6:33:59 p.m.
(Third Contact) Annular solar eclipse ends: 6:37:12 p.m.
(Fourth Contact) Partial solar eclipse ends after sunset, unable to capture.
Pictured below, I used a second type of projection with the use of a 10 inch telescope. Pinhole images are pretty dim and small. I magnified the Sun’s image by using this 10 inch telescope. You MUST NOT look through the telescope at any part of the Annular Eclipse!
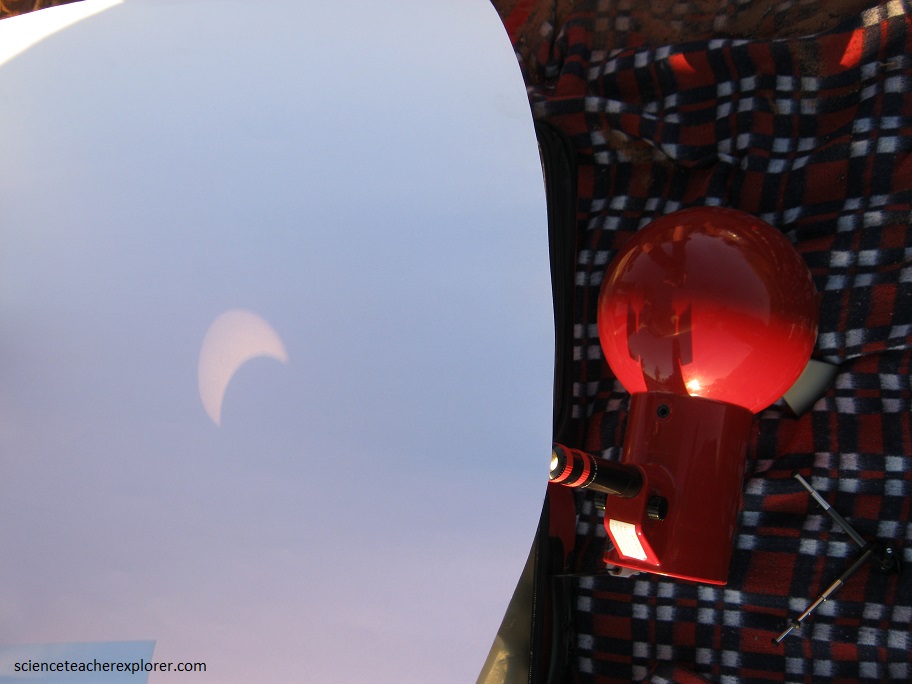
To do the Optical Projection, I had to point the objective of the telescope toward the Sun while holding a piece of white cardboard about one foot beyond the eyepiece. (pictured above). It took a little effort to find the Sun. Once I did, I could focus the telescope to bring the Sun to a sharp image onto the white cardboard screen.
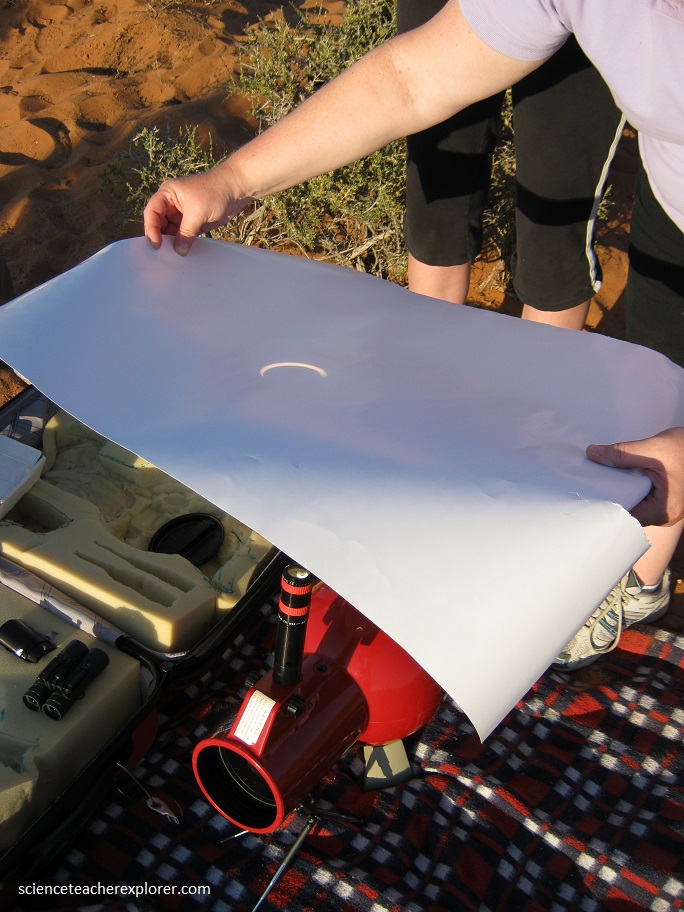
Using the Optical Projection technique I was able watch a beautiful, bright, magnified image of the sun as the eclipse proceeded through it’s phases. I had to adjust the tripod periodically to account for the Earth’s rotation and the sun was going down on the horizon.
Of course, with telescopic filter on a camera, we were able to take a picture of the solar eclipse directly. It is important to note that a proper solar-filter always goes on the front end of the telescopic lens or telescope, blocking the sunlight before it enters the optical system.
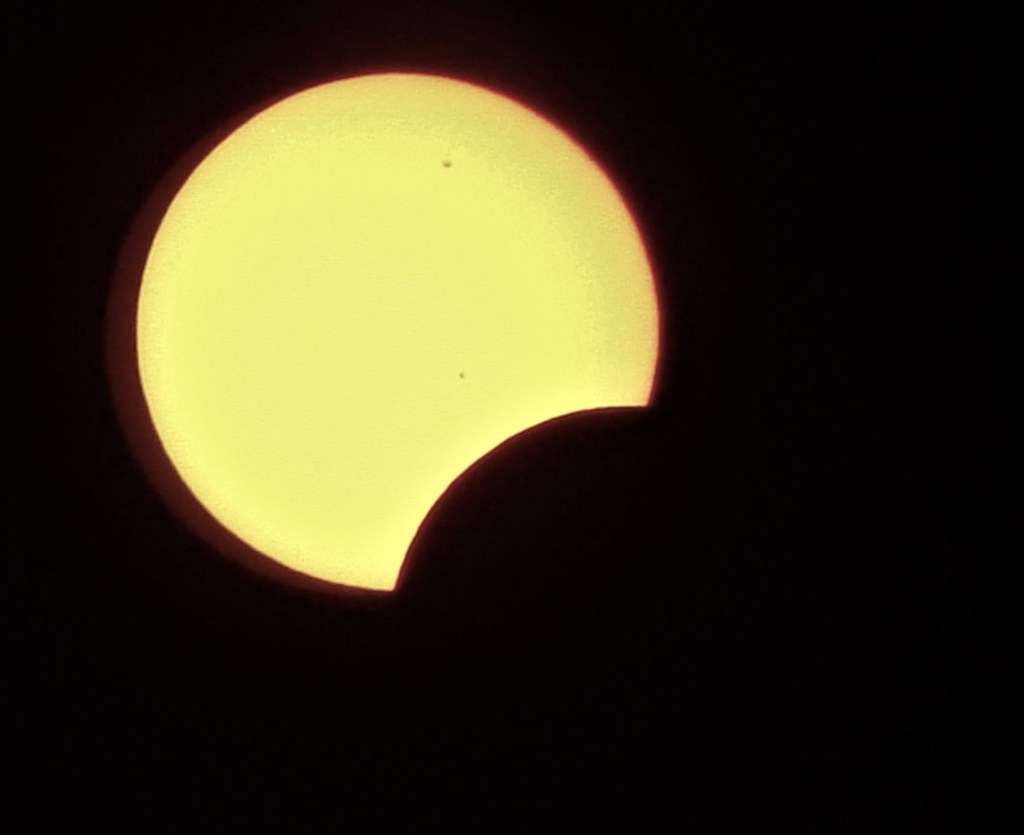
Sunspots are temporary phenomena on the Sun’s photosphere that appear as spots darker than the surrounding areas. They are regions of reduced surface temperature caused by concentrations of magnetic field flux that inhibit convection. The location of the Sunspots, identify one eclipse photo from another.

Pictured above, close to sunset time, the sun at first glance may look like a crescent moon, but such a configuration is of course impossible with the moon. I didn’t get the optimal exposure, due the difficulty of adjusting for the considerably changing brightness of the sun over one hour as it went from blindingly bright to dim as approached the horizon, compounded by the distraction of juggling with two cameras, a telescope and a pinhole plate. However, this image was taken just before it reached the far off mountains on the horizon.
