Independence Mine, AK
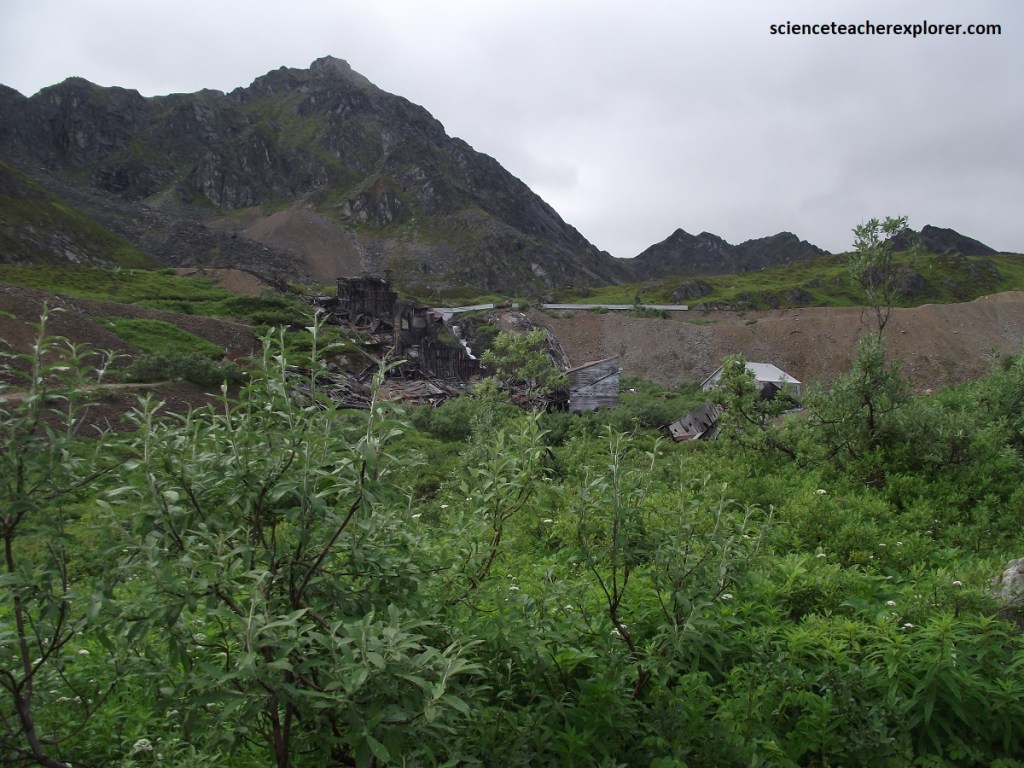
In the summer of 2025, Becky, (my wife), and I visited the Anchorage Region of Alaska. One of our destinations to explore was the Independence Mine State Historical Park, (imaged below).
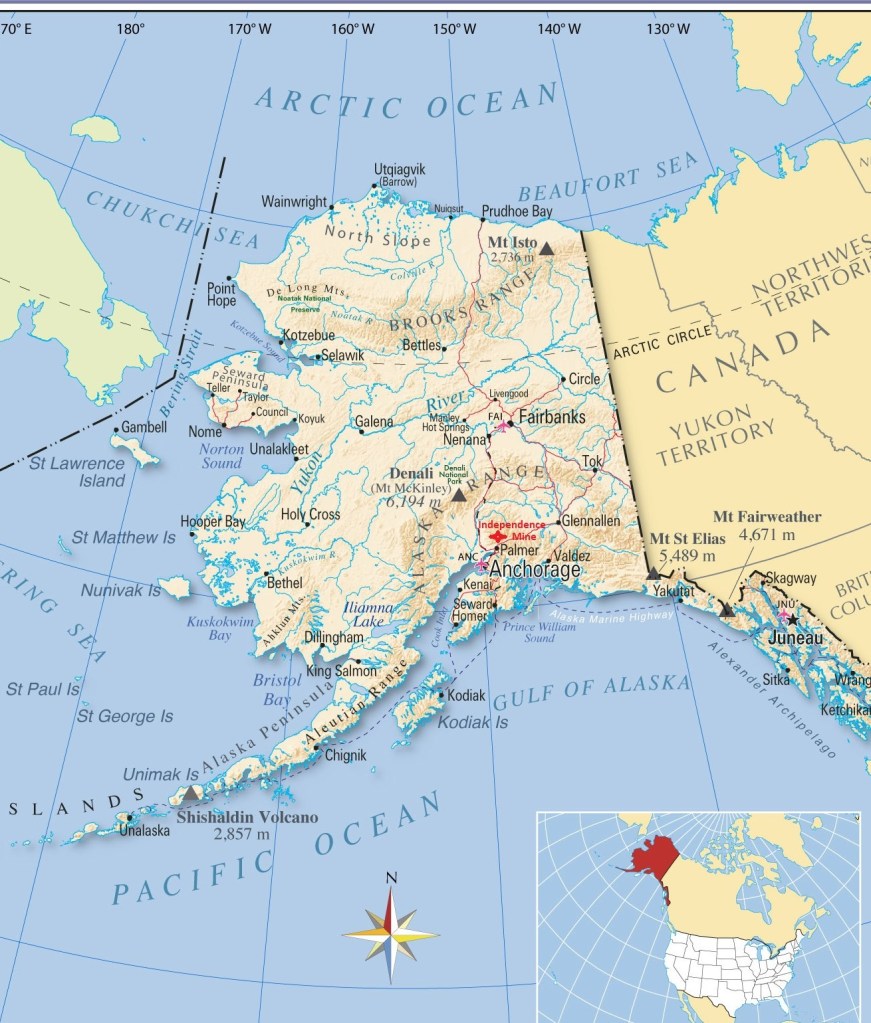
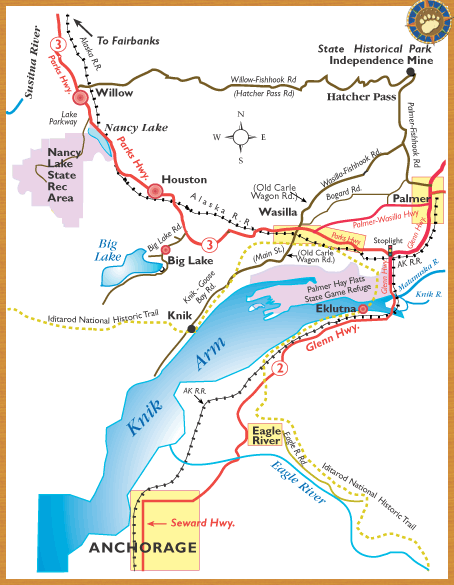
The independence Mine State Historical Park is a stunning, well-reserved former gold mining site located in the Talkeetna Mountains at Hatcher Pass. Situated about 29km north of downtown Palmer, Alaska and 113km northeast of Anchorage.
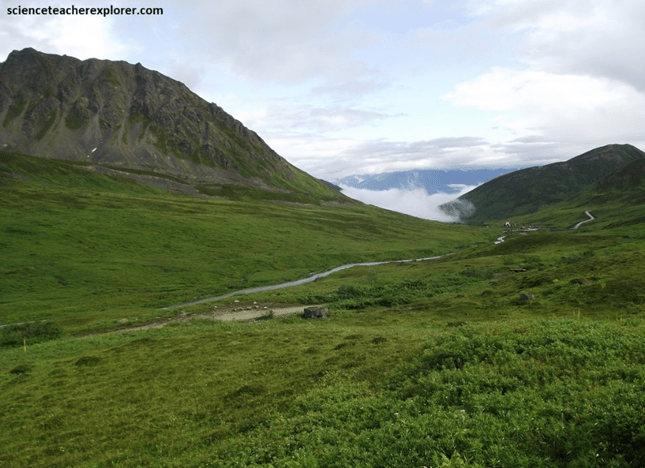
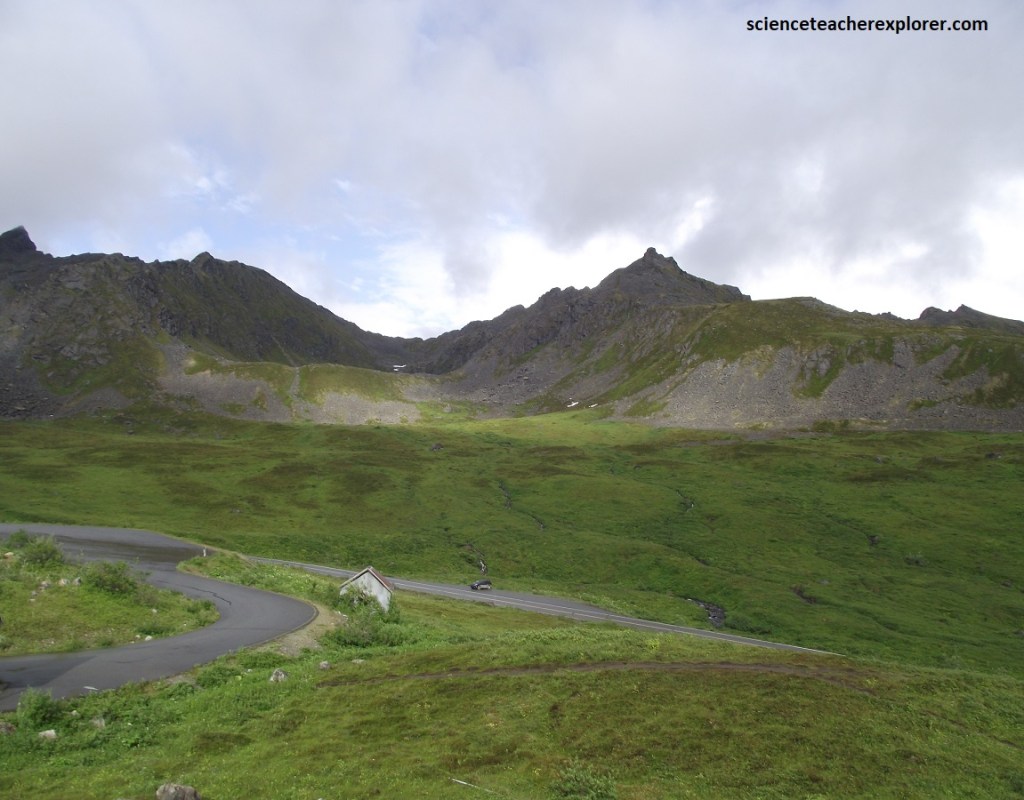
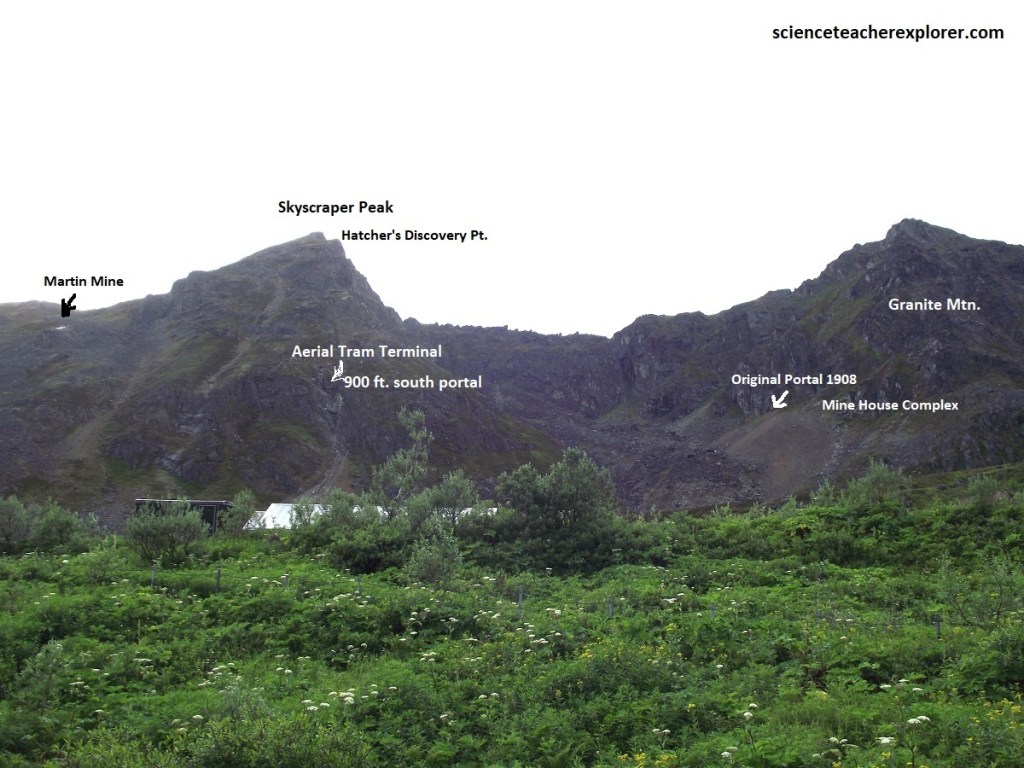
Weather-bleached frame buildings stand ghost-like on the tundra, surrounded by the craggy Talkeetna Mountains at the mine shafts, high on perpendicular cliffs, ore buildings cling to imperceptible niches.
Originally staked in 1907 by the Alaska Gold Quartz Mining Company, the claims, known as the Independence Mines, were transferred to the Alaska-Pacific Consolidated Mining Company in 1933.
From then to 1943, they yielded more than 10,300 lbs of gold, making them the second largest lode-gold producer in Alaska, (the Alaska-Juneau Gold Mining Company was larger). Wartime priorities closed the mines during World War II, and later attempts to re-open them failed. The mine buildings were placed on the National Register of Historic Places in 1974.
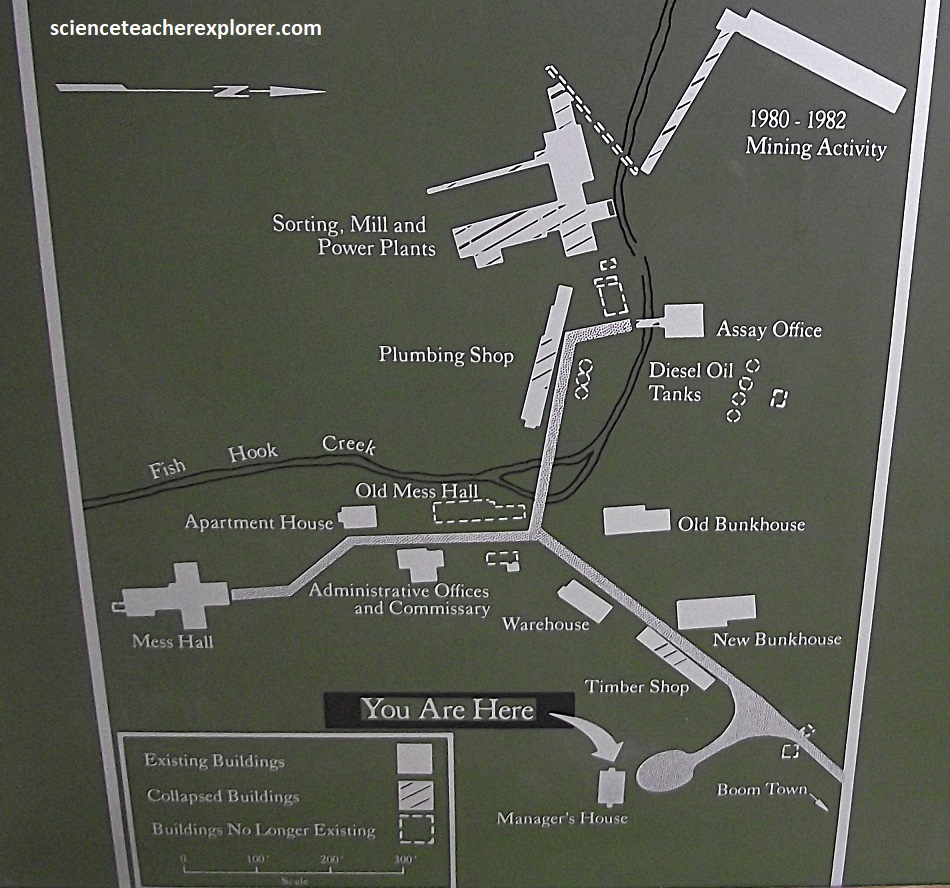
Entirely above the tree-line and sitting in a bowl-shaped valley at the headwaters of Fishhook Creek, the Independence Mine area is renowned for it’s cross-country skiing, trekking and camping. Hunting, horses, snowmobiles and off-road vehicles are prohibited. Numerous mining claims and private lands exist in the area, so collecting rocks or panning for gold is also prohibited.
By the late 1890s floods of prospectors were landing on Alaska’s shores and pushing into the hills in their search for Gold. As flecks in sand or gravel, weathered out of bedrock by water or glaciers, the placer gold deposits were found in the streams.
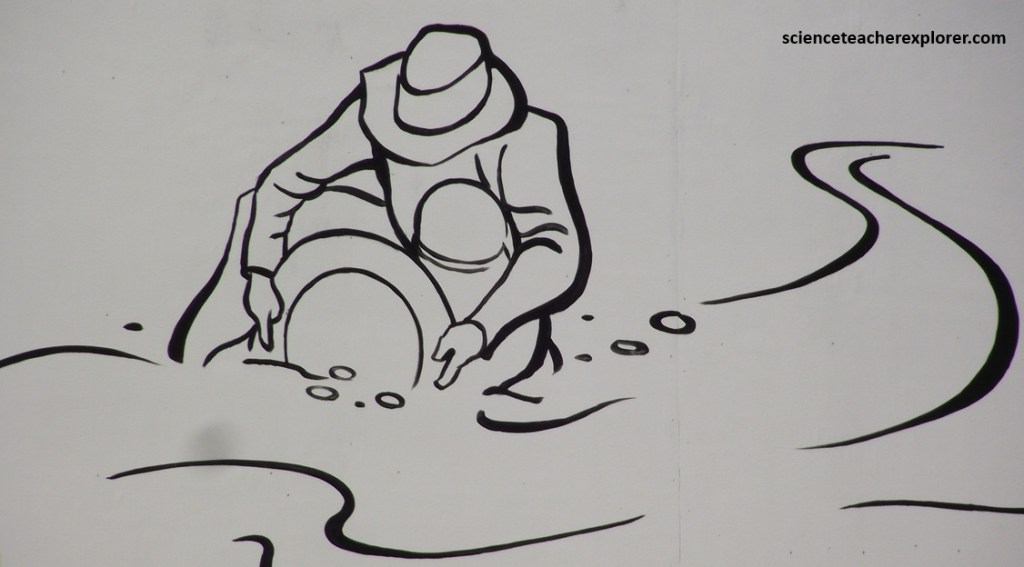
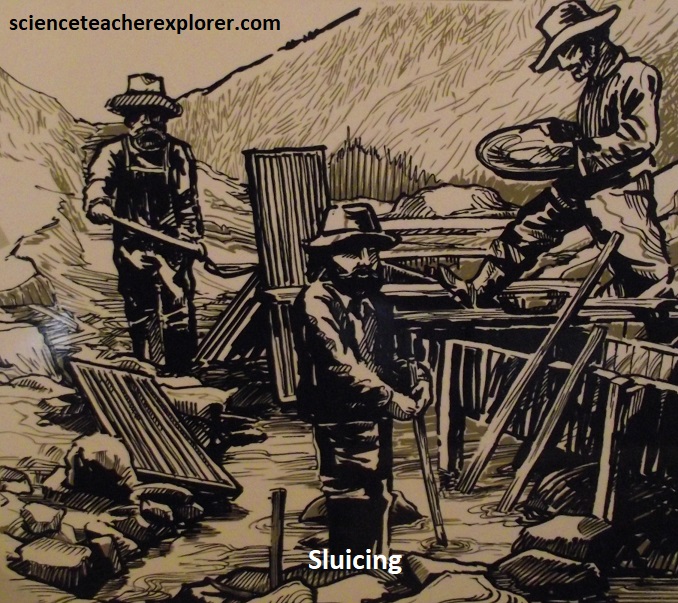
Prospectors used water to wash away the gravel and sand, leaving the heavier gold on the bottom of their gold pan or sluice box.
Placer gold was not as plentiful as expected and production fell short of the miner’s expectations. These gold grains were rough-textured and un-weathered, characteristics that indicated a nearby source. Miners following the clues upstream successfully found the gold lode in veins within the granite-mountain. The first hard rock gold claim in this area was recorded in September, 1906 by Robert Lee Hatcher, for whom Hatcher Pass was named.
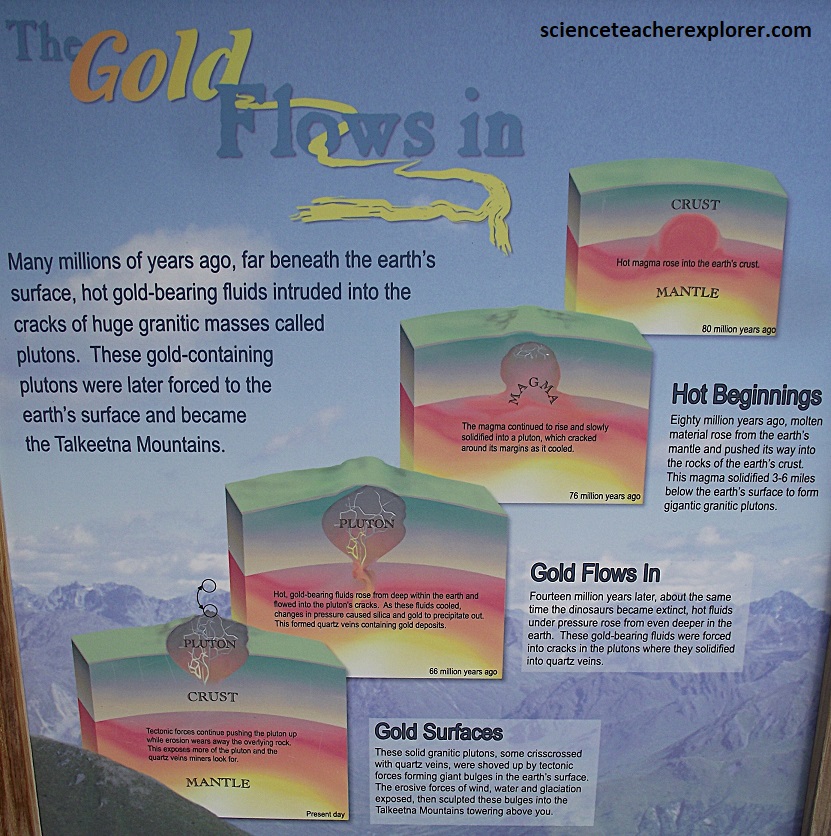
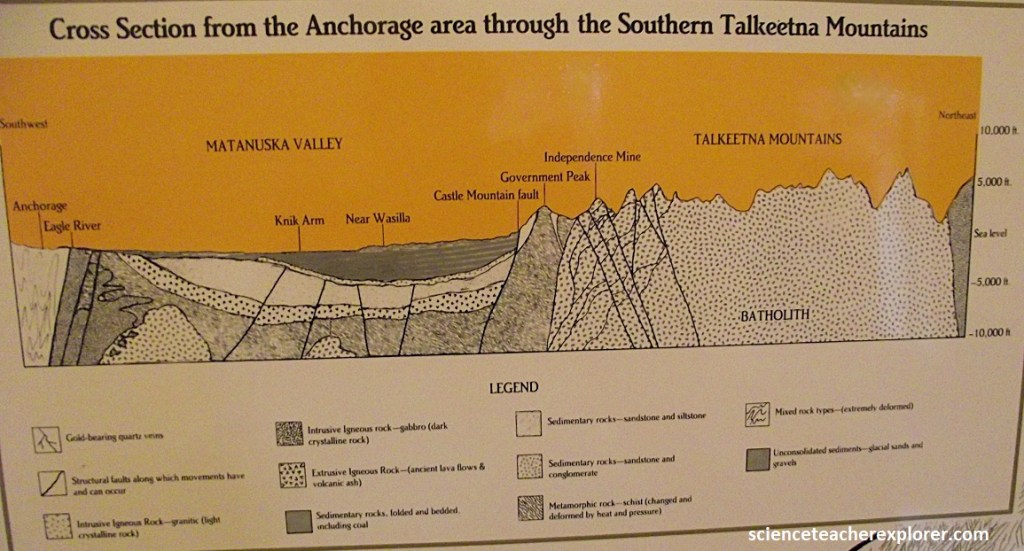
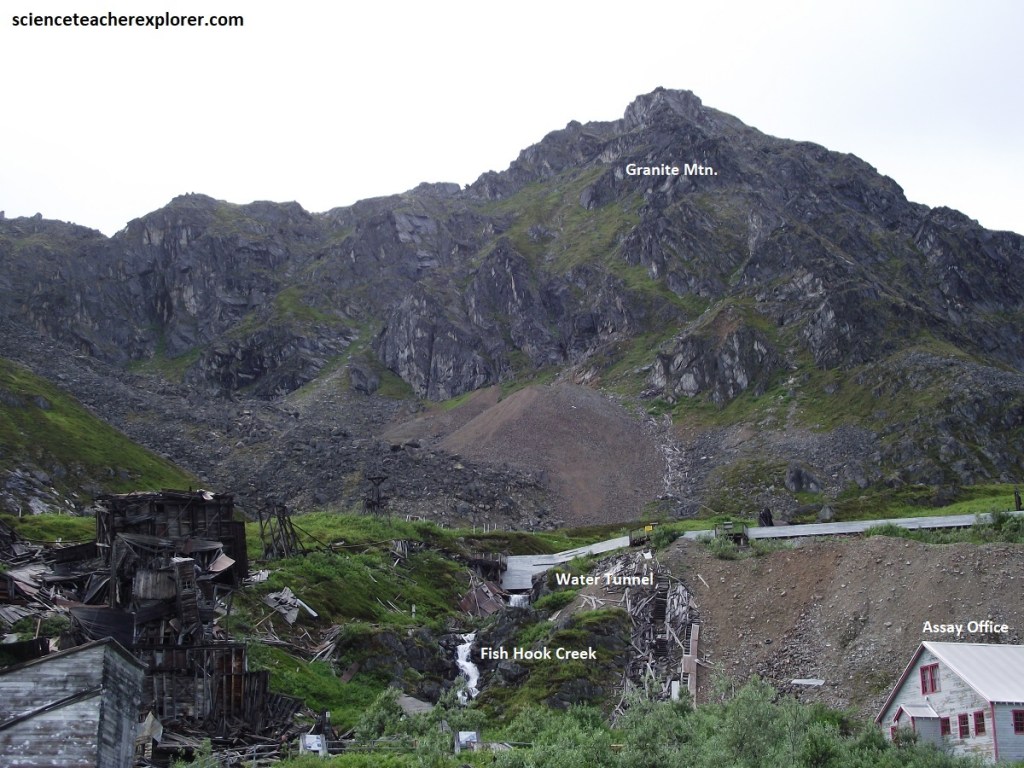
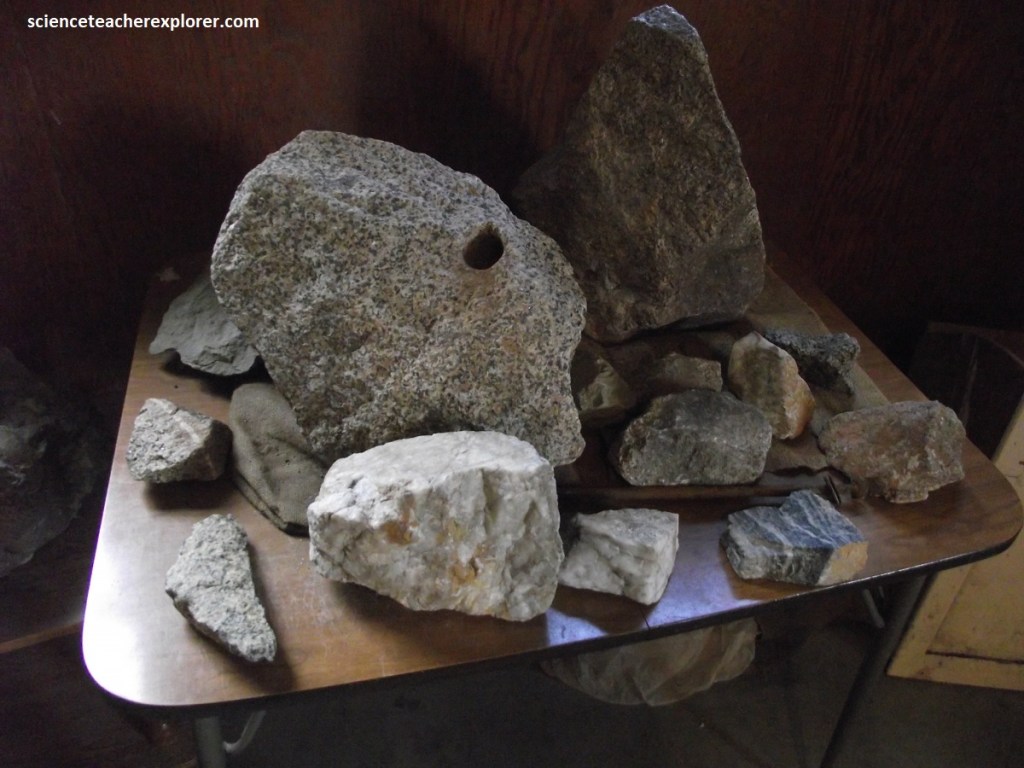
The story of gold in the Talkeetna Mountains really began approximately 75 million years ago, (during the Jurassic time), as a large mass of molten rock several miles thick, which started to cool below the earth’s surface, (imaged above). The solidifying rock contracted and cracked, releasing water solutions which percolated up through these fissures. Veins were formed in the cracks with deposits of quartz, gold, silver, lead, zinc and other minerals. These veins have been deformed over the years. Earthquakes, volcanic activity and other distortions of the earth are created as the Pacific Plate slides under the America Plate in this geologically active area. The veins branch downward several thousand meters, and alternately widen and pinch together as they undulate through the mountain, often stopping abruptly at a fault where sections of earth have moved in relation to one another. As miners ran into these faults the vein might be lost for good, (imaged below).
In this region gold is always found in association with quartz in the bedrock. And the richness of the gold with a vein varies greatly. Gold is usually found in isolated grains, so small they are difficult to see, (pictured below). When prospector Robert Lee Hatcher discovered hard-rock gold here in 1906, mining shifted from the streams to underground in the mountains. Mining hard-rock gold required precise engineering, skilled underground miners and milling process to recover the gold from the quartz.
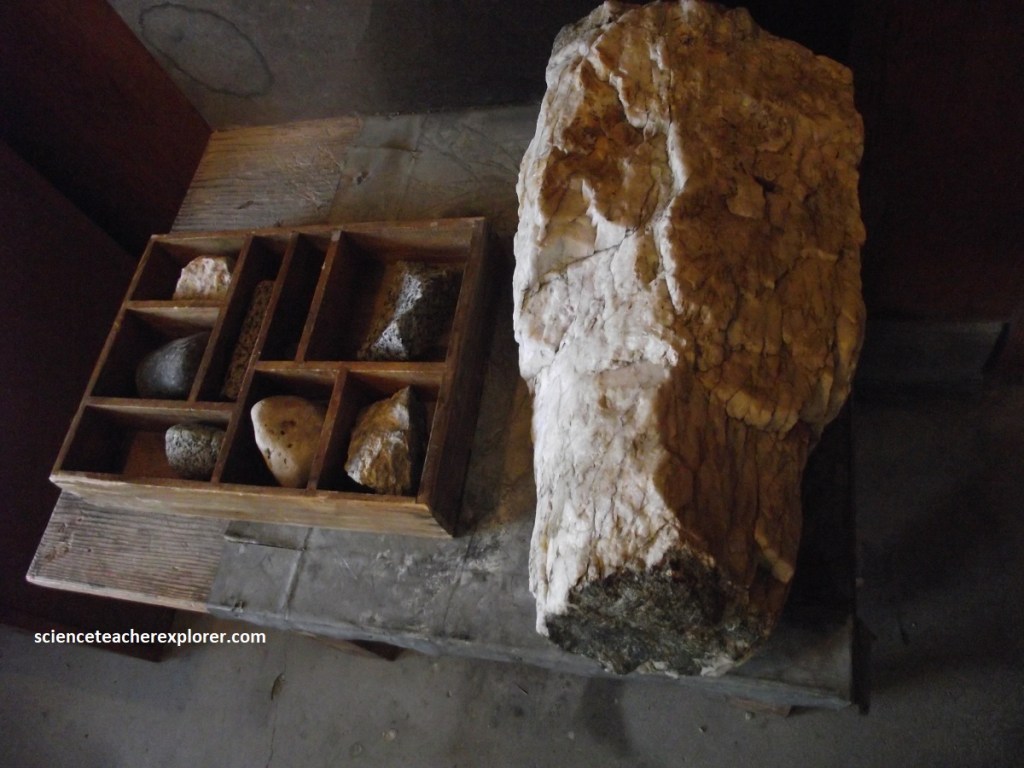
A milling process was necessary to free the small, microscopic grains of gold from the quartz.
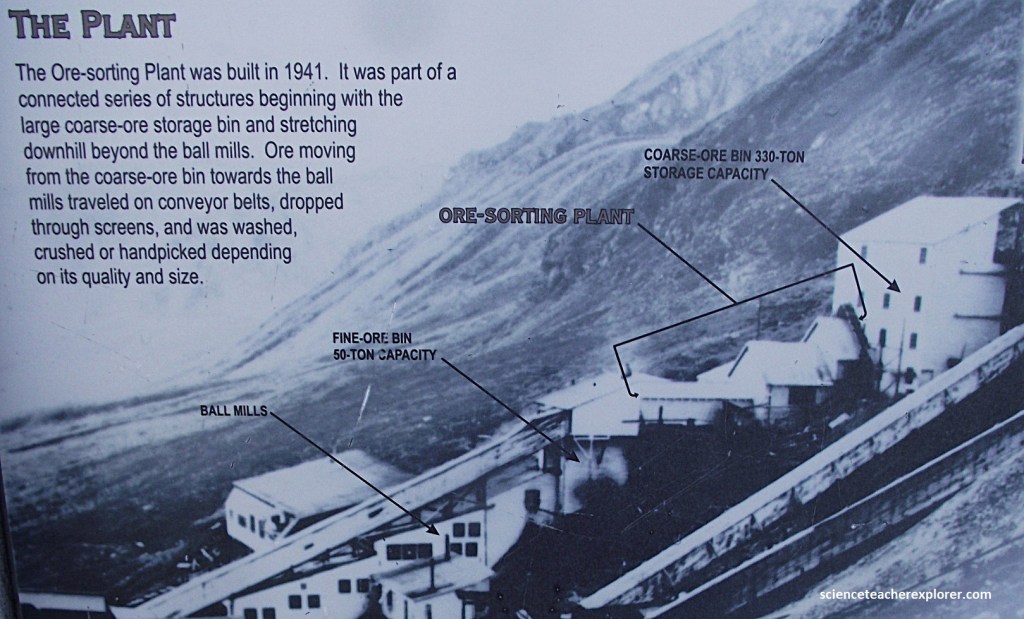
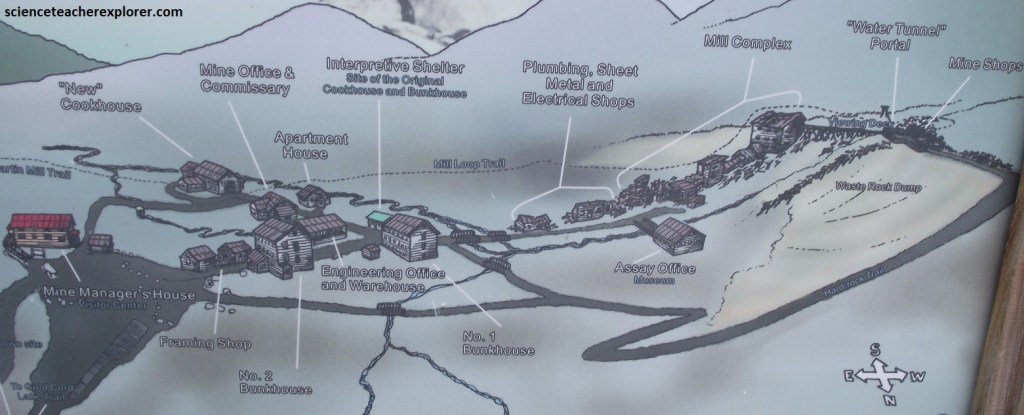
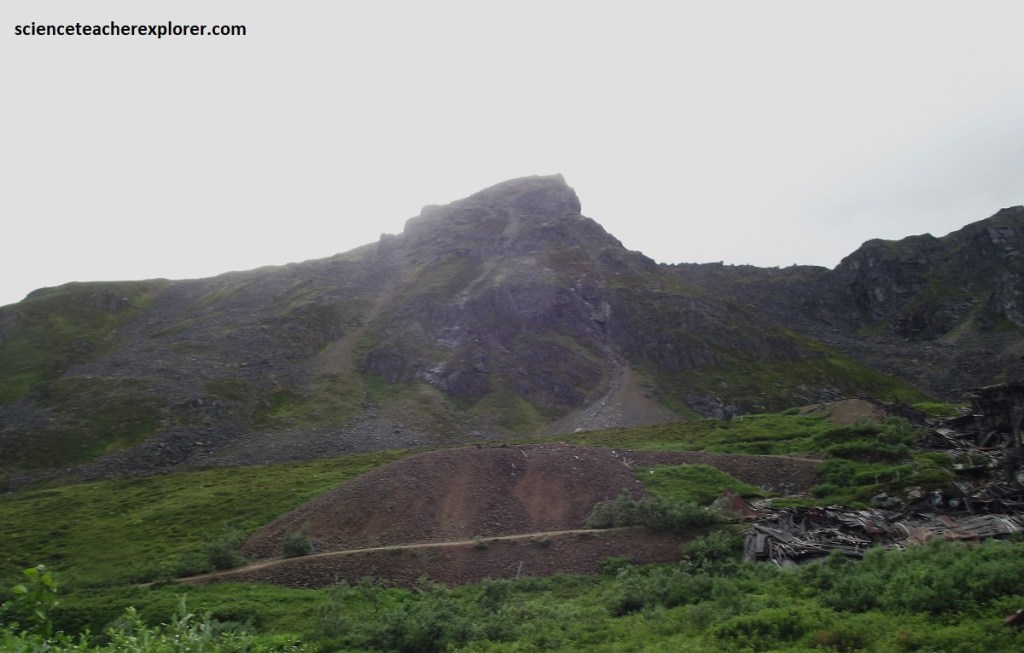
Pictured above, Ore arrived from deep inside Granite Peak and Skyscraper Mountain at the coarse-ore storage bin either by battery-powered railcars out of Water Tunnel or aerial tram buckets. This 3-compartment bin had a 330-ton storage capacity which provided reserves in case the supply of ore was temporarily interrupted. The bin was heated, because frozen ore would not feed evenly onto the conveyor belts.
Ore from the coarse-ore storage bin was fed over a vibrating screen where the “fines” fell through and were conveyed to a fine-ore bin. The larger hand-size chunks traveled on a different conveyor to a second screen where the ore was spray-washed. This revealed the color and textural differences between gold-bearing quartz ore and granitic waste rock.
Pictured above, waste rock was removed by had from the sorting belt, then dropped down a chute into a railcar that was pushed by had outside to a waste dump. The quartz ore continued to a jaw crusher for reduction and was then stored in a fine-ore bin before being fed into the ball mills.
Two ball mills with a total capacity to mill 80 tons of ore per day operated year-round, 24hrs/day. Ore was fed from the fine-ore bin into the cylindrical ball mills. The ball mills, which revolved like cement mixers, were partially filled with steel balls, water and mercury. The impact of the balls rolling and cascading within the cylinders crushed the ore and creating a slurry. This slurry consisting of pulverized rock, gold, mercury and water exited the ball mills and flowed over a series of stepped copper amalgamation plates that were coated with mercury. When the gold and mercury came in contact with each other they instantly formed an alloy called gold amalgam. This amalgam was scraped from the plate once every 8hr shift. It was then pressed to remove any excess mercury and taken to the Assay Office for retorting.
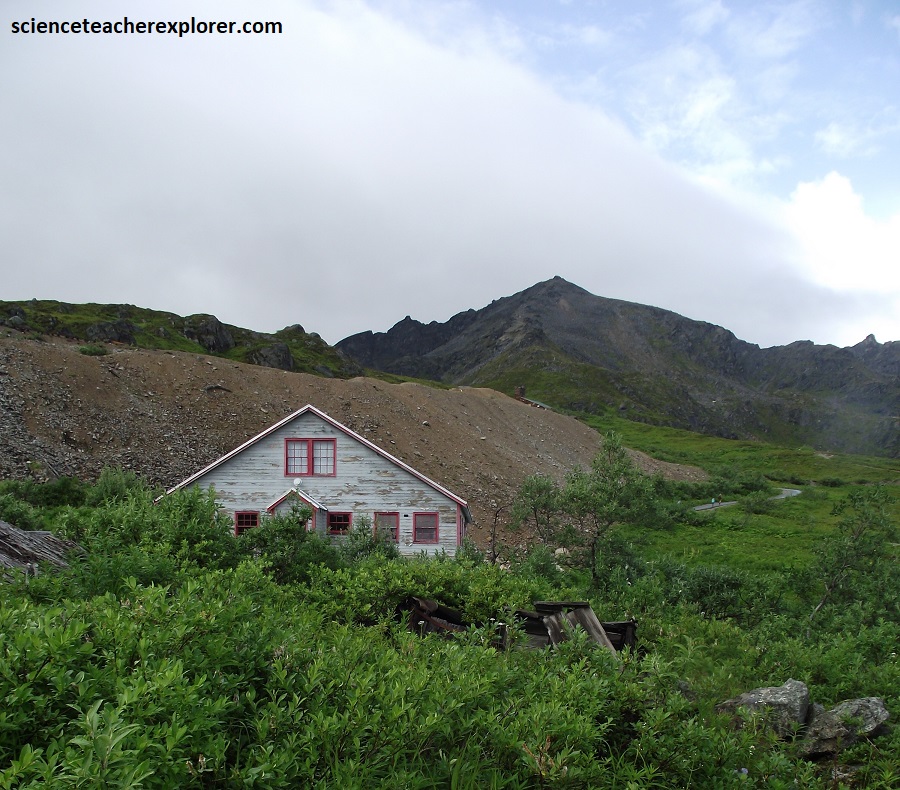
(Pictured above), the Assay Office had a “Bucking Room” where samples were taken from various stages in the mining and milling operation and testing for their gold content.
Pictured above, Mine samples were taken from underground whenever necessary to determine the value of the vein. Waste Rock from the sorting belt was sampled daily to determine how much gold was being accidentally discarded. Mill samples were taken every half hour to measure the amount of gold in the ore. Tailings were sampled every half hour to determine the amount of gold that had been in processing.
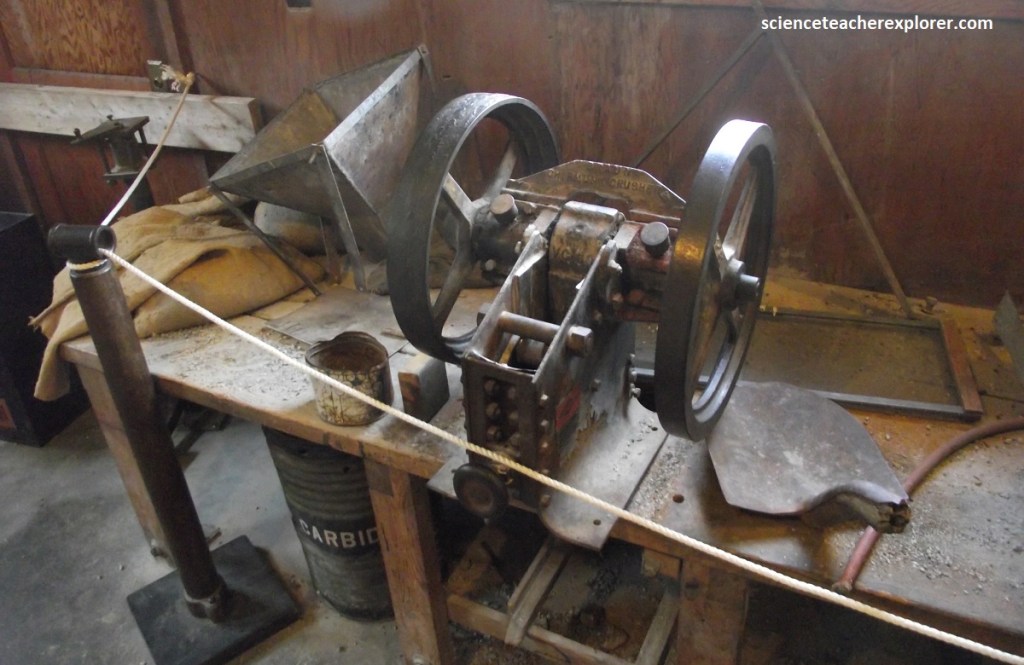
Pictured above, the samples were brought to the “Bucking Room” in the Assay Office where they were dried overnight in an oil-fired bake oven located on a pad. The assayer crushed the dried samples and put them through a pulverizer, reducing them to a fine powder. Both the “Chipmunk” crusher and pulverizer were driven by belt powered from the over-head line shaft. Once they had been crushed, the samples were taken to the furnace room in the Assay Office for firing.
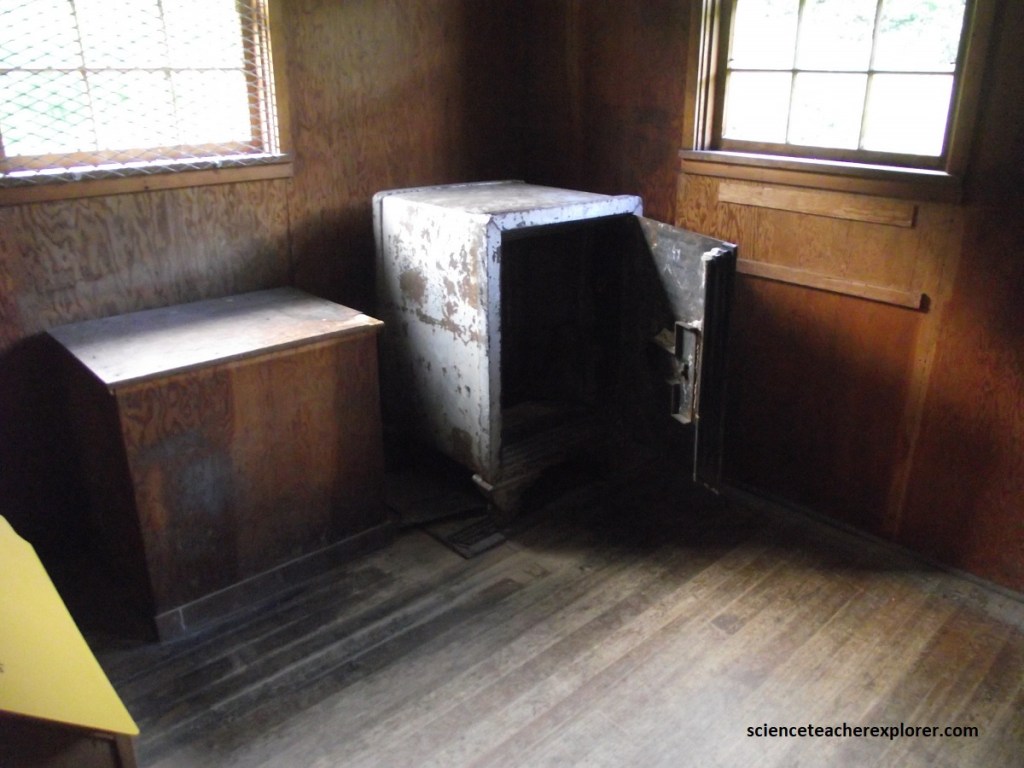
Pictured above, the “balance room” contained a Heusser Gold Balance on the platform above on the left. The balance was used to weigh the pure gold buttons. Extreme care was taken to insure accurate weight, as the balance was literally sensitive to the weight of a feather.
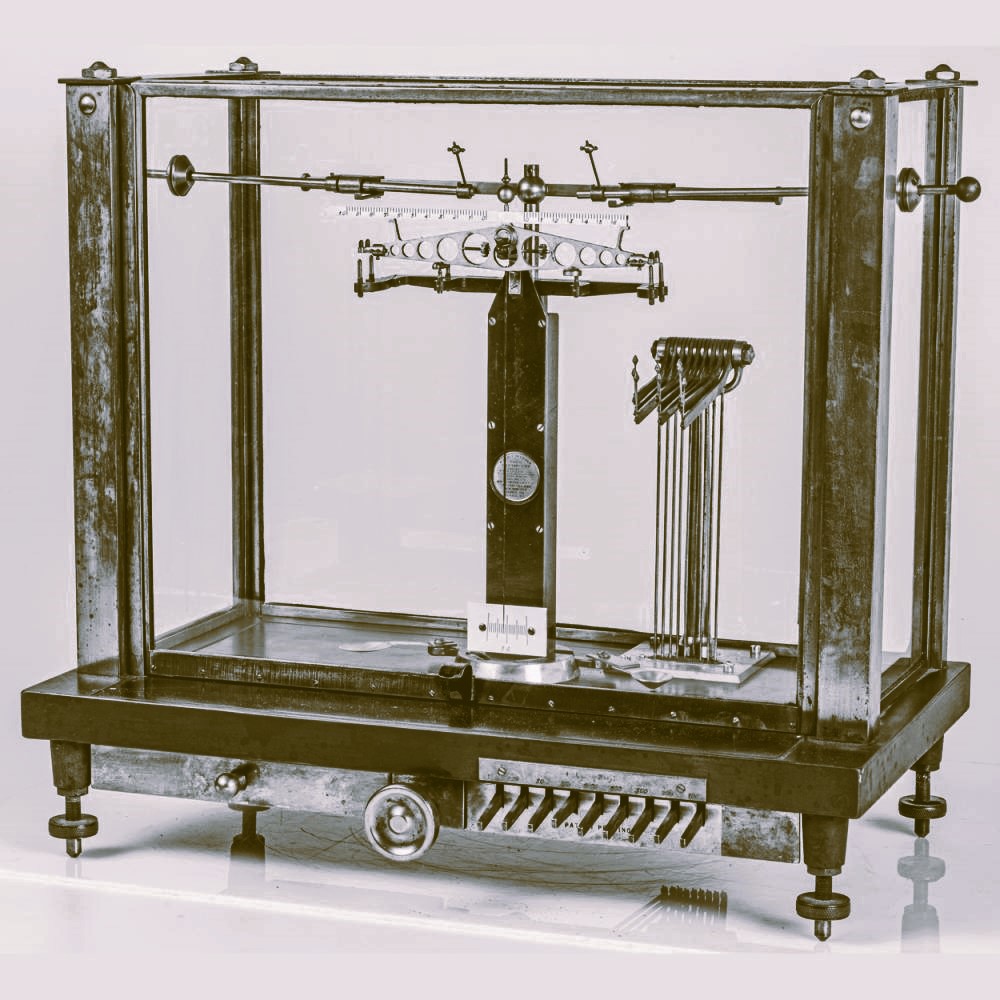
Picture above, the Heusser Gold Balance should actually be on a concrete pedestal wet in bedrock rather than on a table set on a wooden floor. This would eliminate vibrations that could cause variation in the weight of the samples. Inaccuracies in weighing could cause miscalculation in the value of ore veins, resulting in loss of productivity and lower profits for the company.
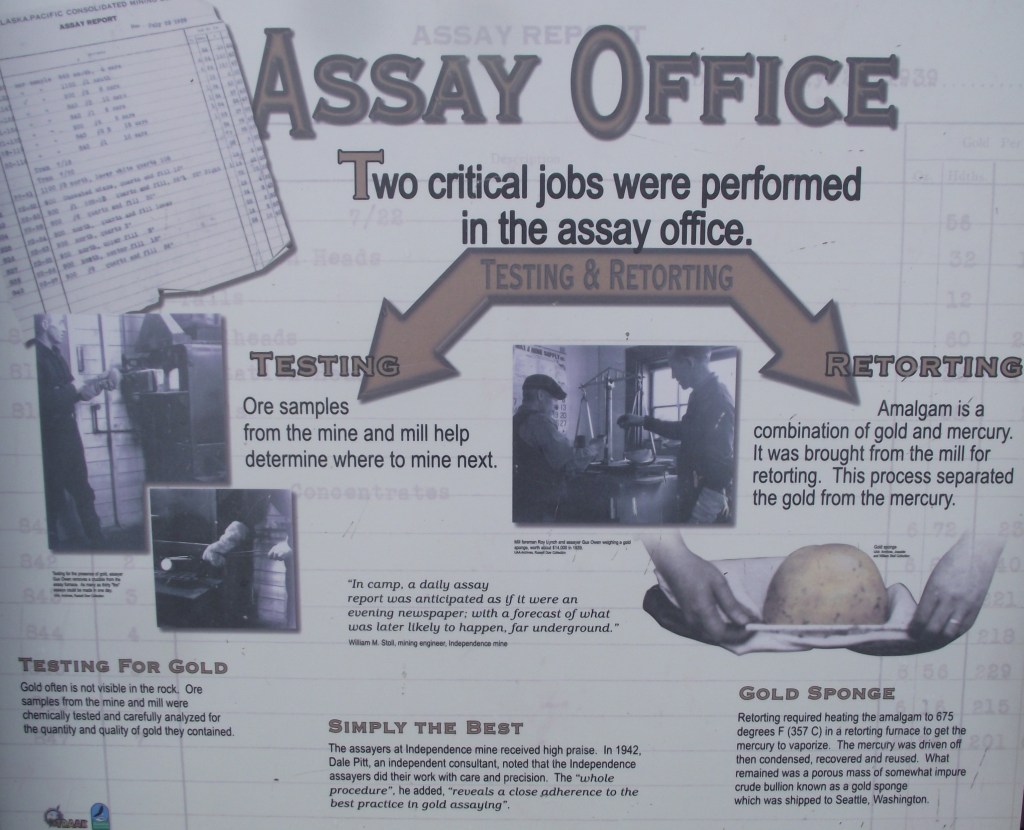
In fire assaying, a measured sample of rock which had been crushed and pulverized (in the bucking room) was heated in crucibles at high temperatures with a mixture (called a flux) of flour, lead oxide, soda, borax and silica. The temperatures, of 1650-1830 degrees Fahrenheit, caused the lead and gold to separate as a button from the other minerals. This button was then remelted in a bone-ash cupel at temperatures of 1400 degrees Fahrenheit. The lead was absorbed by the bone-ash, leaving behind a button of pure gold. Temperature regulation was extremely important, since deviation could result in loss the gold as it too would be absorbed by the cupel. The gold button was weighed, its weight compared with that of the sample, and the amount of gold per ton of ore was calculated.
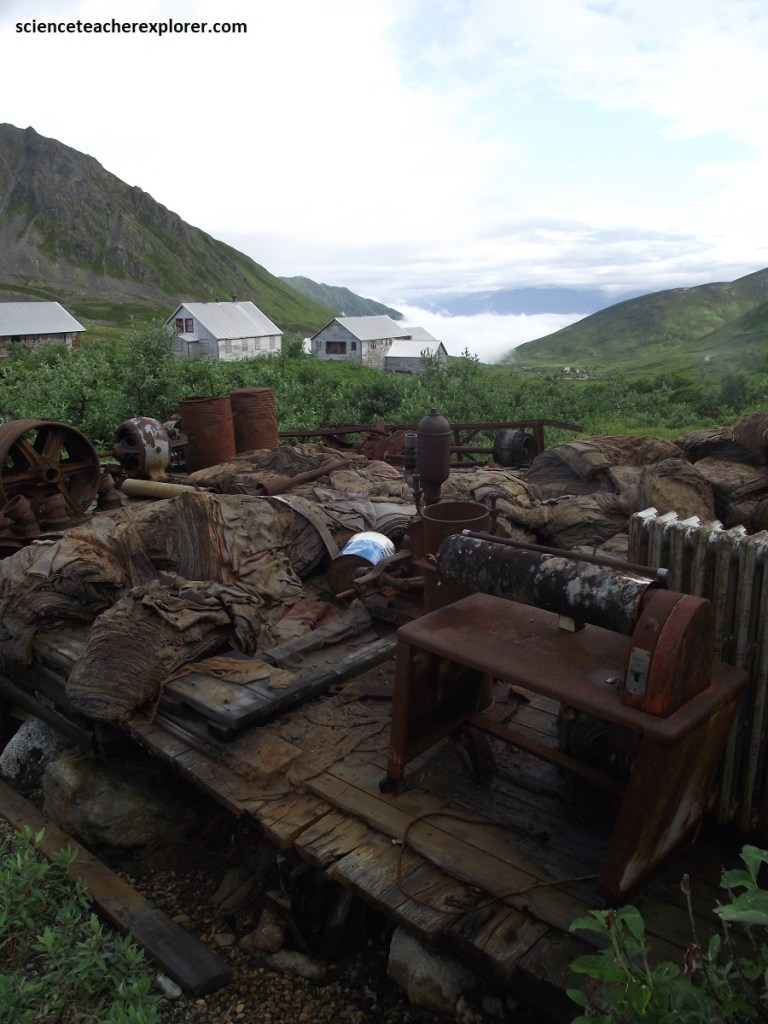
Meanwhile, overflow from the amalgamation plates flowed into a rake classifier where materials that were still too large were separated and returned to the ball mills for another grinding. The remaining overflow continued on to flotation cells where microscopic particles of gold were recovered. Flotation is a process that causes gold-sulfides to float to the top of a mechanically agitated mixture of milled ore, water and chemical reagents. The gold-bearing froth was skimmed off and placed in dewatering vats. The resulting gold concentrates were shoveled into burlap sacks and shipped to a smelter in Tacoma, Washington.
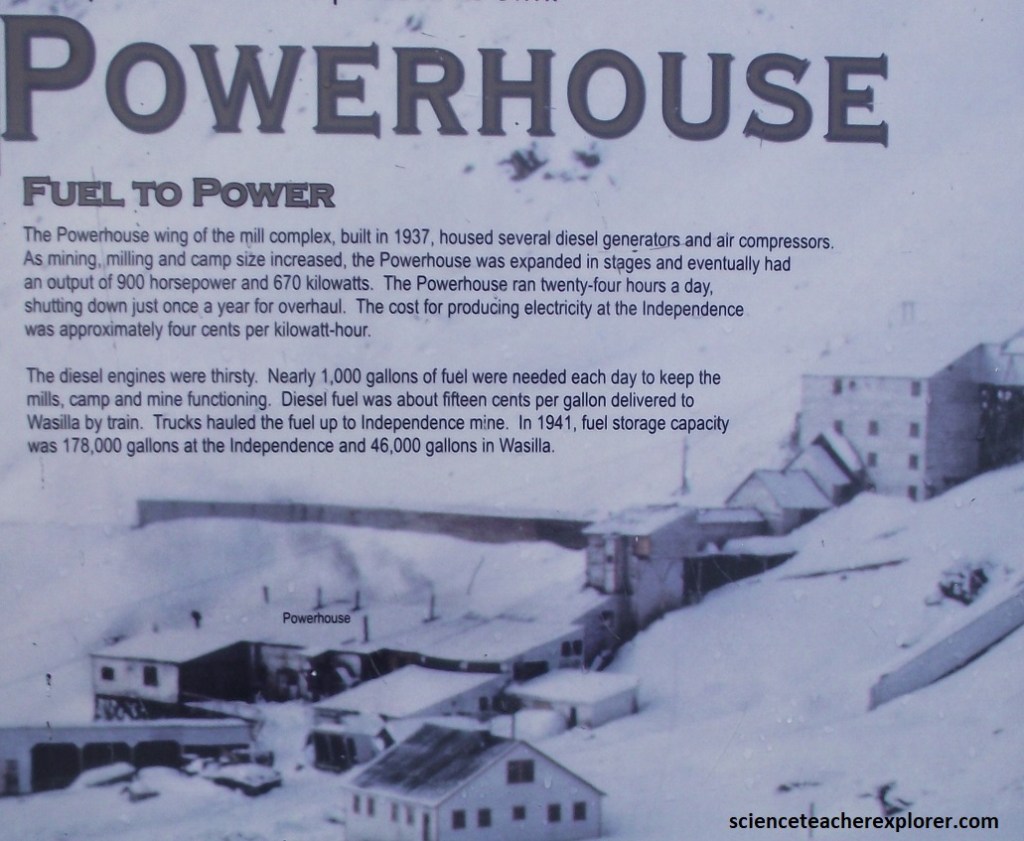
Pictured above, the Powerhouse in the mill complex had its own machine and welding shops, both operating round the clock. The crew included: 3 millmen, 2 oilers, a machinist, a welder, a master mechanic, a crusher-man and 2 men in the Ore-sorting Plant; all worked 8hr shifts under the watchful eye of the Mill Foreman.
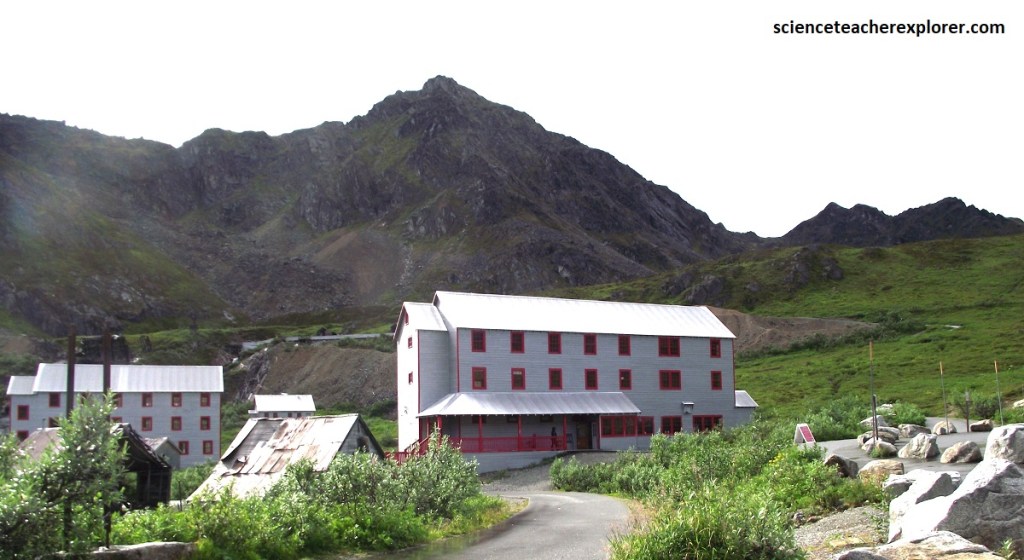
Pictured above, construction of the old Bunkhouse, (No.1 Bunkhouse), in the spring of 1938, brought the first “real bunkhouse to the Independence mine camp. This No. 1 Bunkhouse housed 54 men. Considered the best accommodations among the 38 mines and prospects in the Willow Creak Mining District, it had heat, running water and electricity. The first floor of this building had 2 bedrooms, a recreation room, a library and a room for ventilating and drying wet work clothes. Each of the 24 rooms on the upper floors housed two men and were furnished with beds, a table and closet. Most of the buildings at the Independence were painted with two coats of aluminum paint and had red trim giving the camp a clean, cheerful appearance.
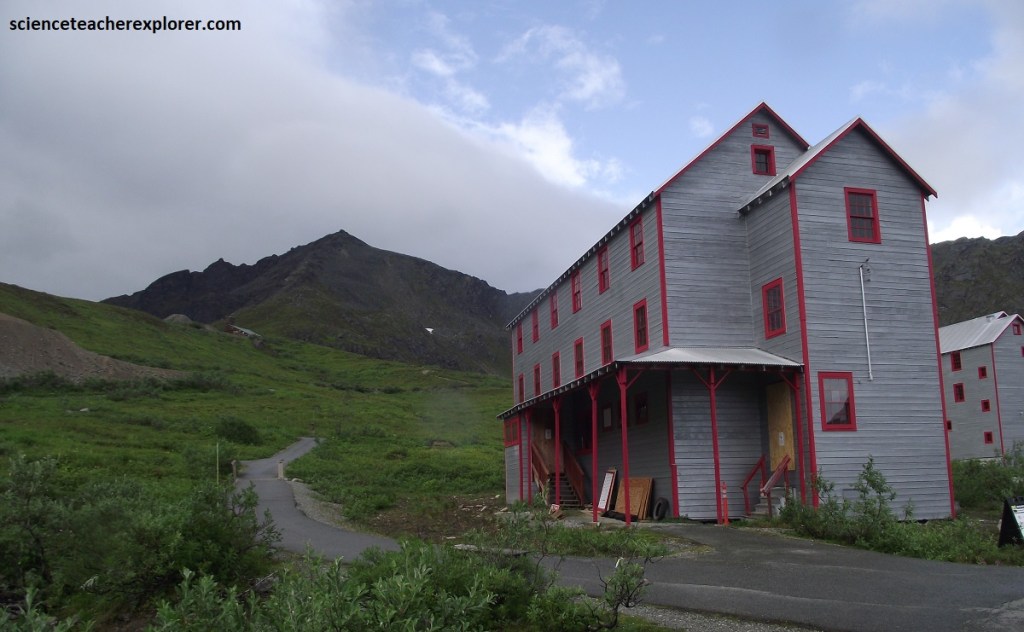
Independence mine prospered and the mining camp continued to grow during the late 1930s and early 1940s. A New Bunkhouse, (No.2 Bunkhouse), was built in 1940, and accommodated 50 additional men. Each of the two upper floors had 10, two-person bedrooms. “Bachelor apartments” built for the engineering staff were located at the end of the upper floor hallways. Designed for 4-5 men they consisted of 2 bedrooms, a sitting room and private bathroom. The first floor had a first-aid room, a drying room for wet work clothes and a washroom with showers. A room on the first floor could seat 80 people and was equipped with a modern projection room for showing contemporary movies.
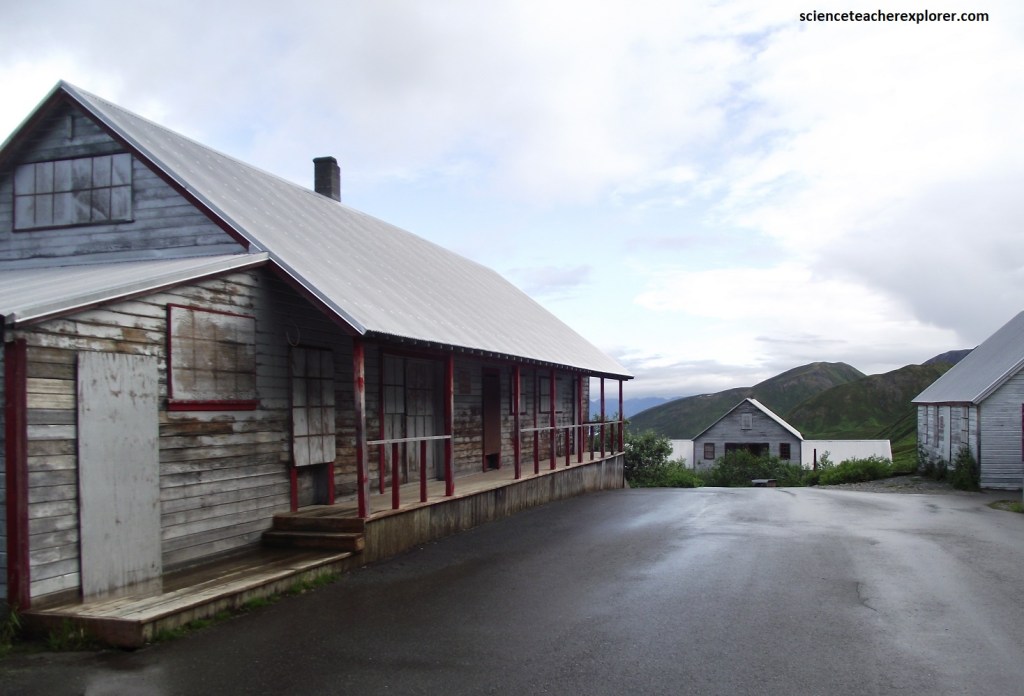
Pictured above, the Mine Office & Commissary was the last of 3 buildings completed during the construction season of 1937. Daily decisions regarding operations, payroll, purchasing, shipping and receiving were made in the mine office. The Mine general manager’s office had a banker’s safe to store the processed gold awaiting shipment to the U.S. Assay Office in Seattle, Washington.
The camp commissary was originally the engineering office and post office. The second floor was called the “bullpen” and was used for temporary bunking until the No. 1 Bunkhouse was built in 1938.
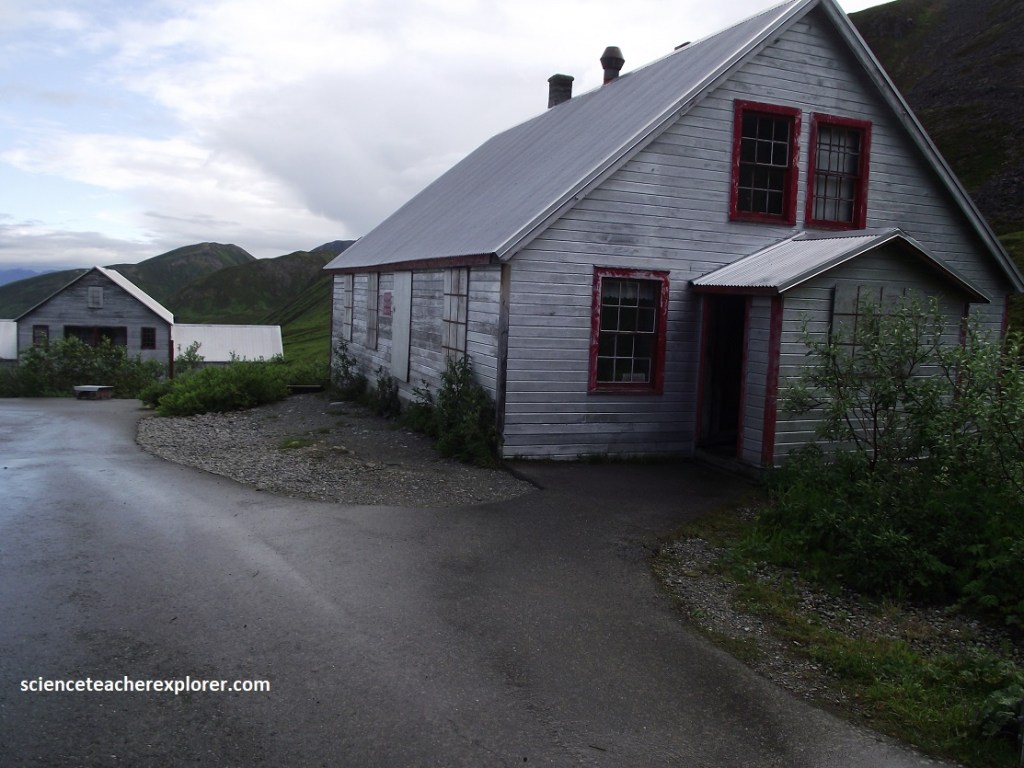
Pictured above, the Apartment House was also completed in 1937. The 4 apartments in this building were living quarters for married supervisors with families, such as Mill, mine and shop foremen. Each of the four identical units had a combination living/sleeping room, a kitchen and a full bathroom on the first floor. Each kitchen was equipped with a cooking stove and refrigerator. In order to provide additional living space, stairways were constructed in each unit in 1938 to allow access to the attic area.
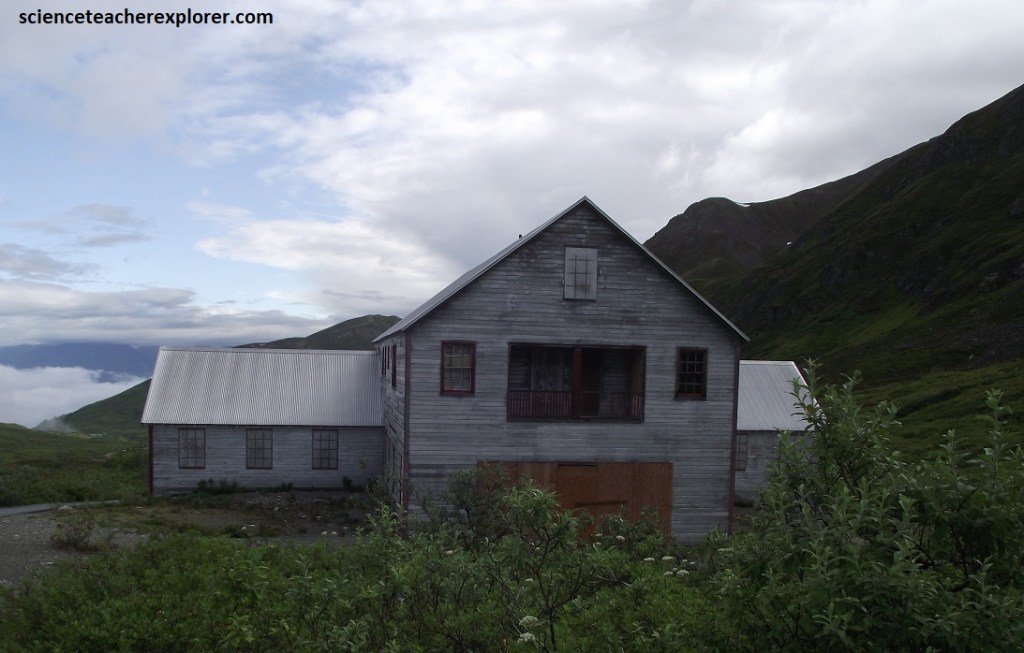
Pictured above, this New Cookhouse and Mess Hall included a fully equipped kitchen, bakery, butcher shop, refrigerated cold storage, dry storage rooms, a dishwashing machine and a 20-table dining room that could seat 160 men. The basement storage bins could hold 10 tons of potatoes. The second floor had a cook’s apartment, quarters for the kitchen helpers of “flunkies” and two comfortable, 3-room supervisor’s apartments. Generous meals of outstanding quality were served family style. A good cook was worth his weight in gold and hard to keep, due to competition from other mining and construction camps throughout Alaska.
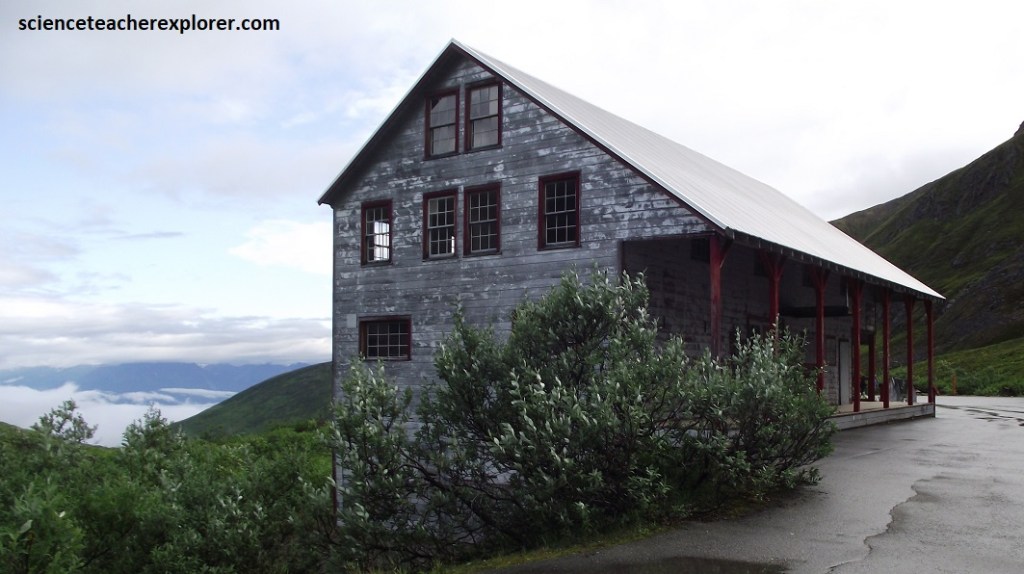
Pictured above, the Engineering Office & Warehouse is where the engineers mapped and diligently followed the underground workings. The information gathered from the mapping helped then follow the gold veins and determined where the miners would drill and blast next, (pictured below). These offices, (built in 1939), were equipped with drafting tables, map-storage cabinets, mechanical calculating machines and a state-of-the-art map duplicating machine. Storage areas on the first floor adjacent to the engineering offices warehoused hardware, small equipment, dry foods and canned goods. The basement included garage space for 4 cars, drying rooms for work clothes, and a washroom and showers for the men who bunked on the second floor.
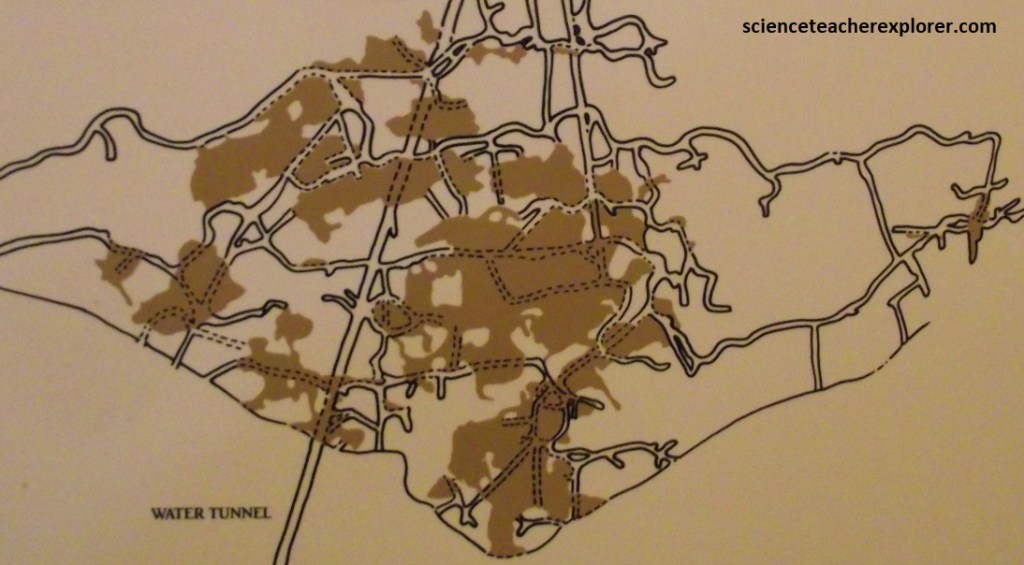
Imaged above, the “water tunnel” portal is just one of several entrances into the Independence Mine, but it was the most important to the overall functioning of the operation. Like a one-kilometer-long tree trunk with branches connecting to other levels in the mine, the tunnel streamlined the transportation of ore, increasing both production and efficiency. After its construction in 1940, 90% of the ore was transported through this tunnel to the mill on ore carts carrying one-ton loads. The ore had formerly been hauled from the high mine portals by aerial trams. Along with being the main route for hauling ore. The water tunnel provided the additional advantages of improved ventilation and drainage for other levels of the mine.
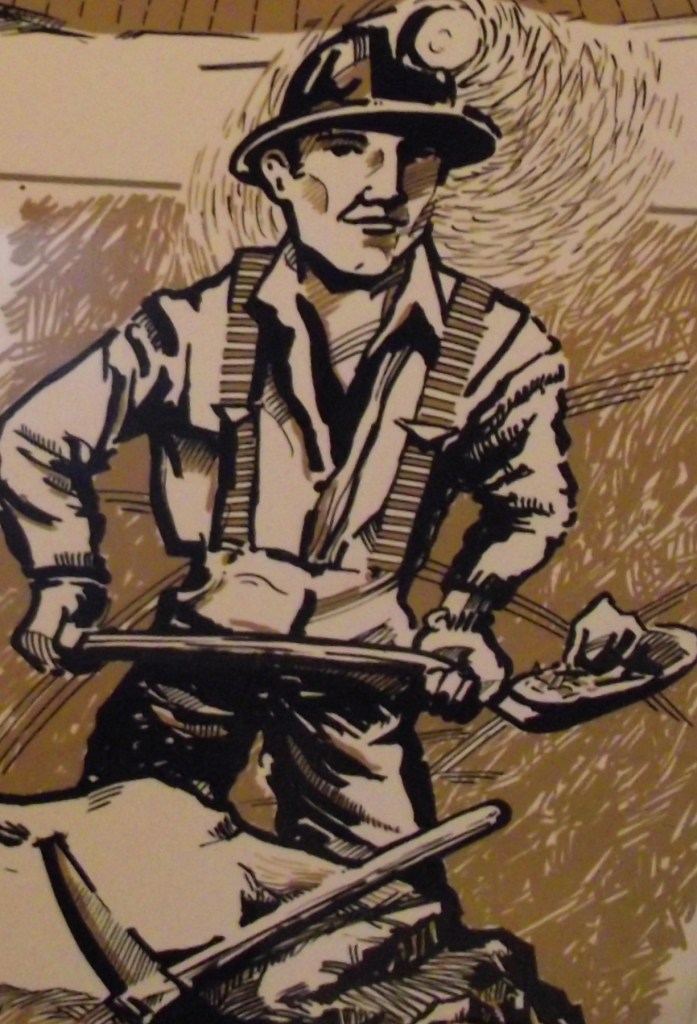
At least half of an engineer’s time was spent working underground. Surveying and mapping the ever-expanding underground workings were a top priority in a long list of engineering responsibilities. The engineer’s work included mapping surface topography, maintenance of assay maps and estimating ore reserves. This information was essential for planning future exploration and development.
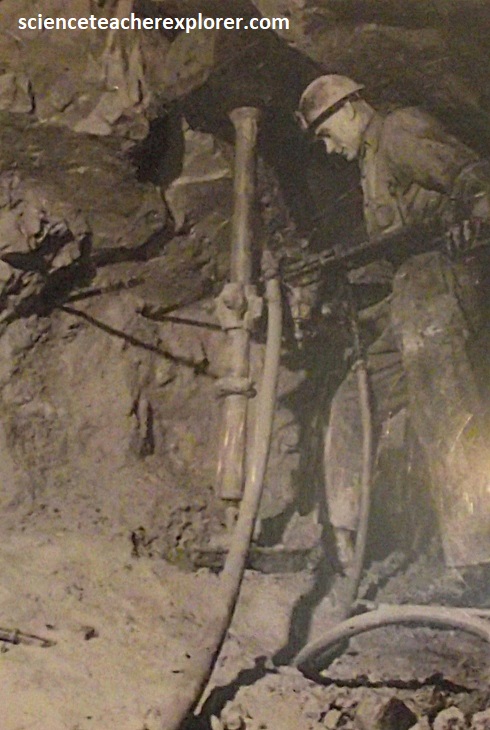
Inside the mine, drilling into the rock is necessary in order to place explosives for blasting material loose. Pneumatic drills were powered by compressed ai which was piped into the mine from compressors in the power plant outside. Blasting loosens the rock for removal. Loaded with dynamite, the drilled holes are detonated either by fuses or by electrical impulses in specific patterns to blast away four to six feet of rock per round. Miners set off blasts at the end of each shift to allow dangerous fumes to clear from the tunnels before mucking. Pictured below, it would take a miner a full 8hr shift to set up a drifter, drill a “round” and pack it with explosives. The blasting would take only a few seconds and was set with a series of process fuse to create delays that directed the blast. Blasting was always done at the end of the shift. This was followed by a 4hr break to allow the dust and gasses to settle before starting the next shift.
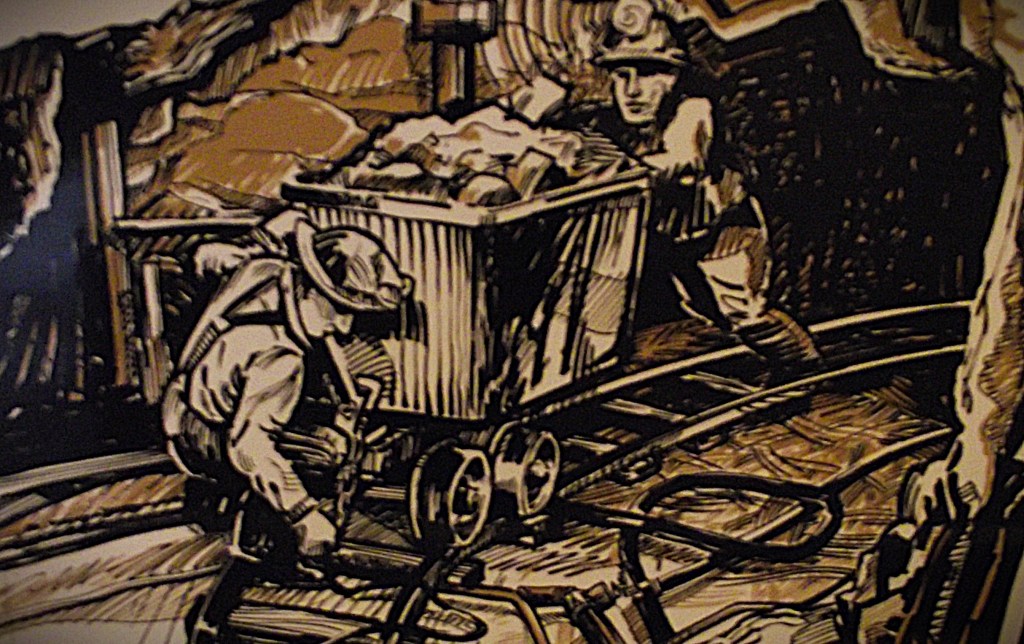
Mucking is the removal by hand of the rock loosened by blasting. The waste rock is discarded as tailings or used as backfill in the mine. As mentioned above, the gold-bearing ore goes to the mill for processing. A mucker, or laborer, was the lowest paid worker in the mine, but he did have a big responsibility. He had to know the difference between ore and waste rock, and separate the gold-bearing quartz from the granite. Blasters and muckers usually worked in teams. At the same time, the mucker shoveled and hammered to clean up the mess and break up the large rock created by the blast from the previous shift. In one shift a mucker could fill 20 one-ton cars with rock, destined for either the mill if it contained enough ore, or a tailing pile if it was waste rock. The ore, which averaged one once of gold in each ton, was carried to the mill by aerial tram or rail cart, (imaged below).
In summary, the Independence mine was the most productive mine in the Willow Creek mining district, producing over 141,000 troy ounces of gold. The mill at the Independence operated 24hrs a day, 7days a week, shutting down only for Christmas and the 4th of July. By 1942, 97% of the gold contained in the ore was recovered. Of this total, amalgamation collected 85% and flotation recovered 12%. The mill recovered an average of approximately one ounce of gold per ton of ore milled. Some high-grade ore milled at the amazing rate of over 3 ounces of gold per ton. In 1942, gold sold at a price set by the U.S. Government of $35 per ounce. The cost of mining and milling at the Independence was $19 per ounce of gold recovered.
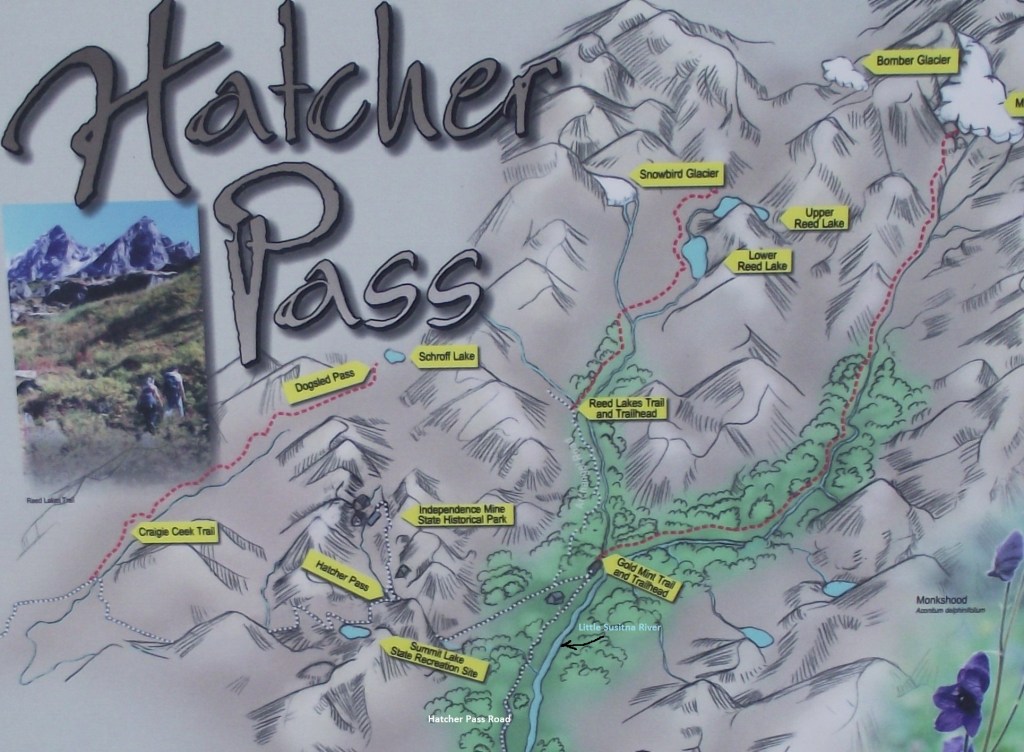
Imaged above, Becky and I drove back down the Hatcher Pass Road towards Anchorage. Just south of the Talkeetna Mountain Batholith, we crossed the infamous Castle Mountain Fault. This fault is one of Cook Inlet Basin’s most characteristic geologic feature.
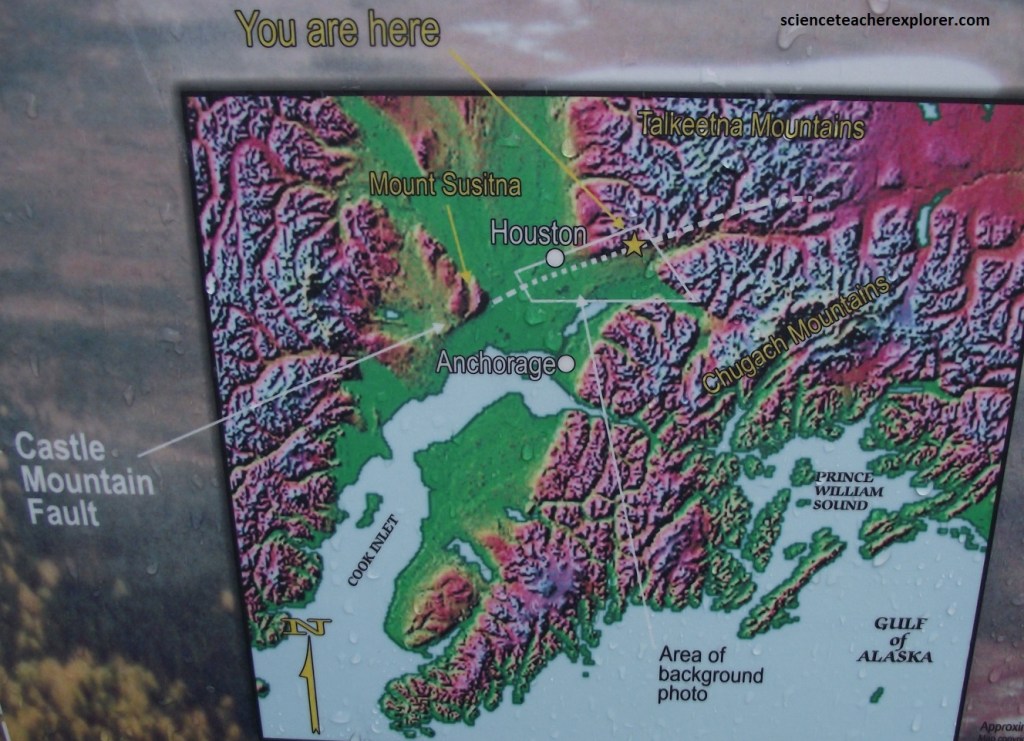
The Hatcher Pass Road crosses the Castle Mountain Fault and the Little Susitna River. This fault has been very active in modern time and has created a dogleg in the Little Susitna’s stream course, a short southern jog in the otherwise southwesterly course. Geologists tracking earthquake histories dig trenches across fault zones to look for evidence of disturbance.
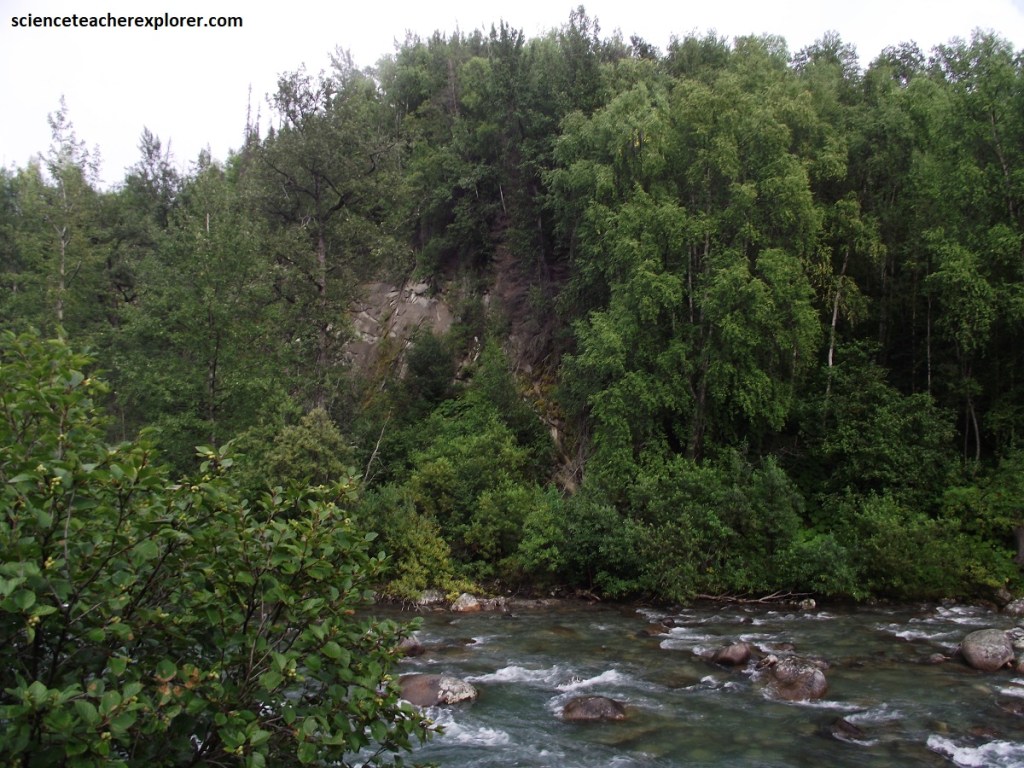
Pictured above, along the Castle Mountain Fault, a record of 4 large-magnitude events over the past 2,700 years lies in the sediments. The frequency of events suggest a recurrence interval for earthquakes of about 700 years. This sedimentary seismic record suggests this are is overdue for the next big one. The Castle Mountain strike-slip fault joins the Lake Clark-Bruin Bay Fault system along the west side of Cook Inlet near Mt. Susitna. This makes this fault run 161-190km long, stretching from the Copper River Basin through the Matanuska Valley and westward to the Susitna River.
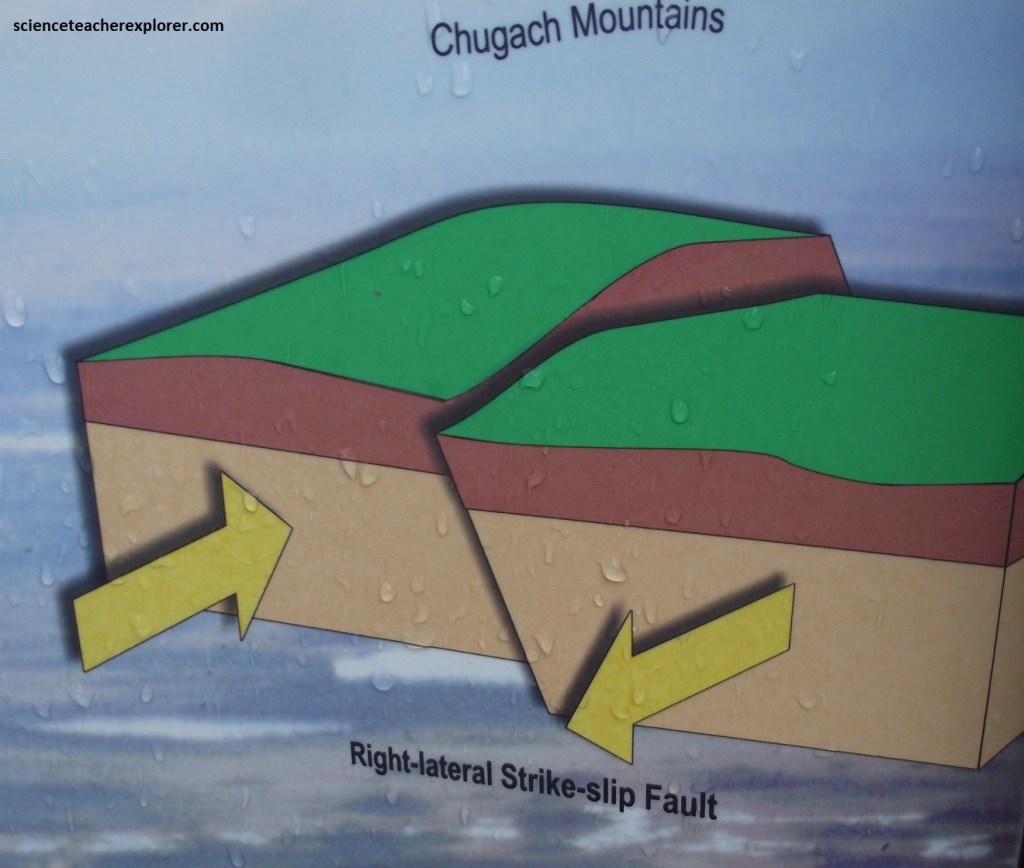
The Castle Mountain Fault is a complex system, and geologists do not agree on it’s type. The recent earthquakes on the fault have been “right-lateral strike-slip,” that is, as you face the fault, the opposite side shifts to your right. However, during ancient earthquakes, the north side of the fault also rose slightly.
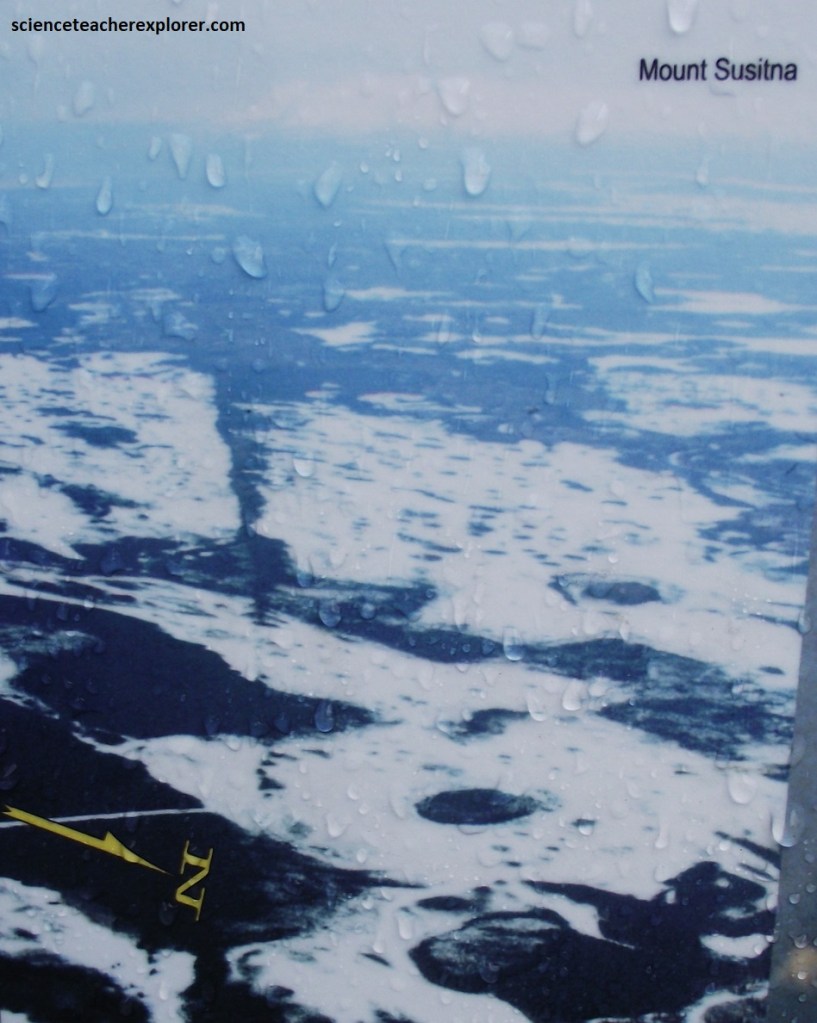
The Castle Mountain Fault has been active (moving during earthquakes) for over 35 million years. From Houston, Alaska to the west, this movement shifted one side of the fault up, resulting in a visible scarp. The eastern portion of the fault produced earthquakes in 1984 and in 1996 but does not have a visible scarp. Since the area around the fault is more heavily populated now, any significant earthquakes could damage towns and cities near the fault including Anchorage, 38km to the south. Some researchers estimate that earthquakes up to 7.5 magnitude could occur along Castle Mountain Fault.
Becky, checking her phone in Alaska, 2025.

